Aerbax's Prodigal Drudge: Difference between revisions
m (→Items) |
|||
| (10 intermediate revisions by 4 users not shown) | |||
| Line 1: | Line 1: | ||
{{Aerbax's Prodigal Quest Links}} | |||
{{Quest Summary | {{Quest Summary | ||
| | | Level = Any | ||
| | | Recommended Level = 75+ | ||
| Quest Type = Fellowship | |||
| Starts With = [[Jarvis Hammerstone]] (Optional) | |||
| | | Starts At = 25.6N, 49.4E in [[Cragstone]] | ||
| | | Route = | ||
| Repeat Timer = 20 Hours | |||
| | | Time to Complete = | ||
| Contracts = [[Contract for Aerbax's Prodigal Drudge]] | |||
| | |||
| | |||
| | |||
| | |||
}} | }} | ||
== | == Overview == | ||
* Investigate the Drudge Fort near Cragstone for Jarvis Hammerstone. | |||
# Head to the fort, destroy the walls, and work your way to the inner ring of the fortress. You will find two NPCs: [[Sergeant Shanks]] the | |||
# Give Sergeant Shanks food items | ;Prerequisites | ||
* Before heading to the Drudge Fort make sure you have multiple food items to feed [[Sergeant Shanks]] in step 3 and [[Farmer Kao's Shovel]] for step 4. Most groups choose to omit these steps and instead have someone PKL through the cave door. If your group is doing this, skip steps 3 and 4. | |||
#Use the Cave Door Key to access the [[Drudge Cave|Cave]] Dungeon. You will enter in a tunnel which connects to a large chamber. Opposite of you will be a portal to the next area. In order to enter it, you must first kill [[Kernel Klank]]. This will release the restrictions on the portal which takes you to the main and final dungeon, [[Under Drudge Fort]]. | |||
#If you don't have the map: Once your portal to the lower dungeon, go straight until you hit a wall; go right 90 degrees until you hit a wall; go left and stay left until you go down a ramp; at the bottom of the ramp, stay right until you reach a balloon and a jump down. | == Walkthrough & Notes == | ||
#When you reach the final room, there is one important thing to remember: Do not kill [[Captain Burnja]]. Killing Burnja puts out the [[Wall of Fire]] and lets [[Bonecrunch]] into the main room where he can and will lay waste to the entire group with his high hollow damage. The general strategy for the final room is this: | # [[Jarvis Hammerstone]] will inform you of a [[Drudge Fort]] west of Cragstone at 25.4N 45.9E. | ||
# When Bonecrunch dies, have everyone in the fellowship loot | # Head to the fort, destroy the walls, and work your way to the inner ring of the fortress. You will find two NPCs: [[Sergeant Shanks]] the Drudge and [[Hoogan]] the Banderling. There is also a cave with a locked door. | ||
# | # Give Sergeant Shanks food items until he slips and tells you about the blueprints. This flags you to pick up the {{Itemlink|Drudge Fort Blueprints}} dropped by the [[Drudge Biter]]s surrounding the cave entrance. You only need to get flagged once per character and then they can pick up blueprints forever. Not many of the Drudge Biters drop the blueprints, so you may need to do some searching to find them. | ||
# | # Bring the blueprints to Hoogan the Banderling, barricaded inside the small hut. Note that you cannot enter the hut, instead you must interact with Hoogan via the small window in the back of the hut. Give him the blueprints and he will tell you that he requires a shovel to escape. There is a [[A Farmer's Plea for Help|rumor]] sitting in a pile of trash and stolen loot which will lead you to [[Farmer Kao]], the owner of the only shovel in Dereth. It saves time to get [[Farmer Kao's Shovel]] before the quest. Give the shovel to [[Hoogan]] in return for the {{Itemlink|Cave Door Key}}. | ||
#* Tip | # Use the Cave Door Key to access the [[Drudge Cave|Cave]] Dungeon. You will enter in a tunnel which connects to a large chamber. Opposite of you will be a portal to the next area. In order to enter it, you must first kill [[Kernel Klank]]. This will release the restrictions on the portal which takes you to the main and final dungeon, [[Under Drudge Fort]]. | ||
# Under Drudge Fort is a large maze, but experienced players will know the way through. If no one knows the way, study the map carefully. Eventually you will jump down to the lower level where Bonecrunch is. | |||
#* If you don't have the map: Once your portal to the lower dungeon, go straight until you hit a wall; go right 90 degrees until you hit a wall; go left and stay left until you go down a ramp; at the bottom of the ramp, stay right until you reach a balloon and a jump down. | |||
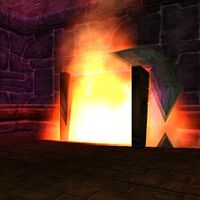
# When you reach the final room, there is one important thing to remember: '''Do not kill [[Captain Burnja]]'''. Killing Burnja puts out the [[Wall of Fire]] and lets [[Bonecrunch]] into the main room where he can and will lay waste to the entire group with his high hollow damage. The general strategy for the final room is this: | |||
#* Have one ore more players lead Burnja off to a side room and hold him there until Bonecrunch dies. | |||
#* Have an archer open the door behind the fire wall and lure Bonecrunch with an arrow. | |||
#* Have all archers and mages open fire on Bonecrunch. Slashing ammo with a rending bow is said to be best. | |||
#* Melees keep the spawns of drudges clear so the archers/mages can stay alive and concentrate on Bonecrunch. | |||
#* If anyone dies, they can portal recall and land at the top of the Under Drudge Fort | |||
# When Bonecrunch dies, it is then safe to kill Captain Burnja. Once Burnja is dead and the flame wall is down, have everyone in the fellowship loot {{Itemlink|Bonecrunch's Chest Key}} from his corpse. | |||
#* Captain Burnja carries 1 special board with nail that can also be turned in for a small amount of XP. He also drops {{Itemlink|Burnja Token}} that can be given in for a title reward. | |||
# Once everyone has a key, exit the dungeon using the [[Escape Portal]] that appears behind Bonecrunch's throne. Using this portal is what flags you to get a reward from Jarvis. | |||
# Close the chest, if open, and then unlock it using your key. | |||
#* {{Tip}} You can tell what item is in the chest by looking at the burden: | |||
#** Orb = 9140 BU | #** Orb = 9140 BU | ||
#** Scroll = 9070 BU | #** Scroll = 9070 BU | ||
#** Hammer = 9840 BU | #** Hammer = 9840 BU | ||
# | # When finished, use the surface portal and run back to Cragstone and speak with Jarvis for experience and a random title reward. | ||
#* {{Optional}} Unwanted items can be traded or turned in for bonus experience. | |||
Notes | |||
* If you have more than 1 fellowship, you will need to kill Bonecrunch more than 1 time so everyone gets a key. To do this safely, '''everyone should move back to one of the side rooms and wait for Bonecrunch and Burnja to respawn'''. If you do not, there is a chance that Bonecrunch will get beyond the flame wall before it can respawn. | |||
== Maps == | == Dungeons & Maps == | ||
{{Dungeon Table | {{Dungeon Table | ||
| Table Rows = | | Table Rows = | ||
{{Dungeon Maps | |||
| Dungeon = Drudge Fort Cave | |||
| Coordinates = 25.4N, 45.9E | |||
| Wiki Map File = 00EE.gif | |||
}} | |||
{{Dungeon Maps | {{Dungeon Maps | ||
| Dungeon = Under Drudge Fort | | Dungeon = Under Drudge Fort | ||
| Coordinates = | | Coordinates = N/A | ||
| Wiki Map File = 00EE.gif | | Wiki Map File = 00EE.gif | ||
}} | }} | ||
{{Dungeon Maps | |||
| Dungeon = Bonecrunch's Treasury | |||
| Coordinates = N/A | |||
| Wiki Map File = 00EE.gif | |||
}} | }} | ||
}} | }} | ||
== | == Rewards == | ||
{{ | === Items === | ||
| | {{Rewards Table | ||
| Quest Task = Loot [[Bonecrunch's Chest]] | |||
| Item Reward = | |||
* Two random rewards: | |||
| | ** {{Icon Link|Protective Drudge Charm}} | ||
** {{Icon Link|Bonecrunch's Hammer}} | |||
** {{Icon Link|Drudge Scrying Orb}} | |||
** {{Icon Link|Scroll of Flame Chain}} | |||
| Max XP Reward = | Percent of Level = | Level Cap = | |||
| Repeat Max XP Reward = | Repeat Percent of Level = | Repeat Level Cap = | |||
| Luminance Reward = | |||
}} | | Title Reward = | ||
{{ | |||
| | |||
| Percent of Level = | |||
| | |||
| | |||
| Repeat Percent of Level = | |||
| | |||
| | |||
| | |||
}} | }} | ||
{{Quest Task | {{Rewards Table | ||
| | | Quest Task = Loot [[Captain Burnja]] | ||
| | | Item Reward = | ||
| Percent of Level = | * {{Icon Link|Burnja's Board with Nails}} | ||
| | | Max XP Reward = | Percent of Level = | Level Cap = | ||
| | | Repeat Max XP Reward = | Repeat Percent of Level = | Repeat Level Cap = | ||
| Repeat Percent of Level = | | Luminance Reward = | ||
| | | Title Reward = | ||
}} | }} | ||
{{ | {{Rewards Table | ||
| | | Quest Task = Speak to [[Jarvis Hammerstone]] after entering [[Escape Portal]]. | ||
| | | Item Reward = | ||
| Max XP Reward = 344,000,000 | Percent of Level = 50 | Level Cap = 180 | |||
| Repeat Max XP Reward = 147,000,000 | Repeat Percent of Level = 20 | Repeat Level Cap = 180 | |||
| | | Luminance Reward = | ||
| Title Reward =Random: "Cragstone Knight" OR "Guardian of Cragstone" | |||
}} | }} | ||
{{ | {{Rewards Table | ||
| | | Quest Task = Give unwanted reward from [[Bonecrunch's Chest]] to [[Jarvis Hammerstone]] | ||
| | | Item Reward = | ||
| Max XP Reward = 66,000,000 | Percent of Level = 10 | Level Cap = 180 | |||
| Repeat Max XP Reward = | Repeat Percent of Level = | Repeat Level Cap = | |||
| | | Luminance Reward = | ||
| Repeat Percent of Level = | | Title Reward = | ||
| | |||
}} | }} | ||
{{Rewards Table | |||
| Quest Task = Hand [[Burnja's Board with Nails]] to [[Jarvis Hammerstone]]. | |||
| Item Reward = | |||
| Max XP Reward = 66,000,000 | Percent of Level = 10 | Level Cap = 180 | |||
| Repeat Max XP Reward = 1,839,776 | Repeat Percent of Level = 3 | Repeat Level Cap = 90 | |||
| Luminance Reward = | |||
| Title Reward = | |||
}} | }} | ||
{{Rewards Table | |||
{{ | | Quest Task = Give [[Burnja Token]] to [[Jarvis Hammerstone]] | ||
| | | Item Reward = | ||
| Max XP Reward = | Percent of Level = | Level Cap = | |||
| Repeat Max XP Reward = | Repeat Percent of Level = | Repeat Level Cap = | |||
| Luminance Reward = | |||
| Title Reward = Cragstone Firefighter | |||
| | |||
| | |||
| | |||
| | |||
| | |||
| | |||
}} | }} | ||
{{Rewards Table | |||
| Quest Task = Give [[Farmer Kao's Shovel]] to [[Hoogan]] | |||
| Item Reward = | |||
| Max XP Reward = | Percent of Level = | Level Cap = | |||
| Repeat Max XP Reward = | Repeat Percent of Level = | Repeat Level Cap = | |||
| Luminance Reward = | |||
| Title Reward = Hoogan's Hero | |||
}} | }} | ||
< | == Images == | ||
Click image for full size version. | |||
<gallery widths=200px heights=200px perrow=3> | |||
File:Jarvis Hammerstone Live.jpg|Jarvis Hammerstone | |||
File:Aerbax's Prodigal Drudge - Drudge Fort Live.jpg|Drudge Fort | |||
File:Aerbax's Prodigal Drudge - Hoogan's Prison Live.jpg|The house where Hoogan is prisoner and guarded by Sergeant Shanks. | |||
File:Aerbax's Prodigal Drudge - Klank's Portal Live.jpg|Kernel Klank | |||
File:Aerbax's Prodigal Drudge - Fire Wall Live.jpg|Fire wall that falls when Burnja dies. | |||
File:Bonecrunch Live.jpg|Bonecrunch | |||
</gallery> | |||
== Dialog == | |||
=== Opening Dialog === | |||
:Jarvis Hammerstone tells you, "We've driven those theiving Drudges back to their fort! but I'm worried they're still planning something..." | |||
:Jarvis lowers his voice to a whisper. | |||
:Jarvis Hammerstone tells you, "Alot of help those Royal Guard were, just standing around and sending messages back and forth!" | |||
:Jarvis Hammerstone tells you, "The Healer, Avalenne, says she can see Drudges patrolling their fort west of town." | |||
:Jarvis Hammerstone tells you, "The Cragstone Elders have charged me with the task of getting rid of the drudges and I will reward you well if you can discover what they're doing in that fort of theirs." | |||
=== Sergeant Shanks === | |||
:Sergeant Shanks tells you, "I no talk to you. You are not Drudge and I told not to talk to not Drudge!" | |||
=== Handing in Drudge Fort Blueprints to Hoogan === | |||
You | :You give Hoogan Drudge Fort Blueprints. | ||
Hoogan | :Hoogan looks the blueprints over. | ||
:Hoogan tells you, "Alright, we know we need to dig to avoid these tunnels the Drudges dug here and here, but we don't have anything to dig with. If we had a shovel we could really get out of here." | |||
:Hoogan tells you, "Can you find us a shovel? I don't know what the drudges used to dig their tunnels, but maybe you can find a clue around. If you bring me back a shovel I'll give you this key we slipped off of Shanks when he was sleeping today. I think it leads into their tunnels below." | |||
:Hoogan tells you, "Remember, if you find a shovel be sure not to give it to anyone else. Bring it to me." | |||
=== Handing in Farmer Kao's Shovel to Hoogan === | |||
:You allow Hoogan to examine your Farmer Kao's Shovel. | |||
:You hand over 1 of your Farmer Kao's Shovels. | |||
:Hoogan bestows the title "Hoogan's Hero" on you. | |||
:Hoogan tells you, "Perfect! With this we can finish the tunnel we've been clawing and scrapping out under the bed in here. You've saved my skin friend. Take this key and bring the fight to the Drudges in their tunnels and caves below." | |||
:Hoogan gives you Cave Door Key. | |||
:Hoogan tells you, "The tunneling is going much faster now that we have the shovel you brought us. You should use that key I gave you to get into the Drudges under ground caves. I'm pretty sure their leader is down there. At least that's what Shanks let slip :the other day. Thanks again human and good luck." | |||
=== Bonecrunch === | |||
:Bonecrunch says, "Stay away from my apples!" | |||
:Bonecrunch says, "You! How did you get into my fortress? Never mind, now it's time for you to go crunch!" | |||
:Bonecrunch says, "This is my throne room. I am BoneCrunch and that's my throne. There, tours over, now you die." | |||
:Bonecrunch says, "Your time as masters of this land is at an end humans. You have no idea what is coming." | |||
:Bonecrunch says, "You have defeated my child. Your kind shows just as much promise as the Martine creature did. Soon you will embrace the simple truth. Clarity and purpose will be paid for with free will." | |||
:Bonecrunch says, "Your not part of the Plan!" | |||
:Bonecrunch says, "What? You call this loot? How come I never get your weapons?" | |||
:Bonecrunch says, "Come! Protect your leader! Bite! Stab! Burn!" | |||
=== Captain Burnja === | |||
:Captain Burnja tells you, "Leave now humans or I burn you so bad you be dead!" | |||
=== Returning to Jarvis Hammerstone === | |||
:Jarvis Hammerstone tells you, "Ah, I see you bested the Drudge leader, Bonecrunch, again. Well done! His sudden rise to power still worries me though." | |||
:Jarvis Hammerstone tells you, "The Royal Council is investigating the various creature uprisings in Dereth. It seems that the Mosswarts and Banderling have also been acting a bit odd lately. These are troubling times. I am glad that we have brave souls like you to protect our people." | |||
:Jarvis Hammerstone tells you, "For your continued bravery and service to Cragstone I grant you the wisdom of the Town Elders of Cragstone and the title "Cragstone Knight."" | |||
:You've earned (20%) experience. | |||
=== Handing in Burnja Token === | |||
:You give Jarvis Hammerstone Burnja Token. | |||
:Jarvis Hammerstone tells you, "Ah, this is from that pyro-maniacal Drudge. I never did buy him as the leader of the raids." | |||
:Jarvis Hammerstone tells you, "Still, I'm glad you were able to defeat him. I'm so tired of trying to put out all the fires he keeps starting." | |||
:Jarvis Hammerstone tells you, "I hereby name you a "Cragstone Firefighter."" | |||
=== Handing in Protective Drudge Charms === | |||
:You allow Jarvis Hammerstone to examine your Protective Drudge Charm. | |||
:You hand over 1 of your Protective Drudge Charms. | |||
:Jarvis Hammerstone tells you, "This is one of BoneCrunch's treasures? It looks like some of the other Drudge Charms I've seen, but it's obviously more powerful. I'll have Suya the Jeweler take a look at it. Thank you, here is a small reward for your help." | |||
:You've earned 66,000,000 experience. (Level 200) | |||
=== Handing in Burnja's Board with Nails === | |||
:You give Jarvis Hammerstone Burnja's Board with Nails. | |||
:Jarvis Hammerstone tells you, "This is the weapon that Drudge you called Burnja was wielding? Not very sophisticated is it?" | |||
:Jarvis Hammerstone tells you, "I'm sure I can find someone who will buy this. Here have some of my writings on economics in a Post-Magical Revolutionary society." | |||
:You've earned 1,839,776 experience. | |||
== Update History == | |||
{{Update History| | |||
[[Prodigal Sons]] | |||
* Quest introduced. | |||
[[Filling in the Blanks]] | |||
* XP reward for killing [[Bonecrunch]] reduced to 9,000,000 (anti-macro and camping measure). | |||
* Additional XP reward of 15,000,000 added for completing the quest to balance the change made to Bonecrunch. | |||
[[The Quest for Freedom]] | |||
* Repeat timer changed from 6 days to 20 hours. | |||
}} | |||
Latest revision as of 05:16, 8 May 2024
|
Banderling - Drudge - Harbinger - Human - Lugian - Monouga - Mosswart - Olthoi - Shadow - Tumerok - Tusker |
| Walkthrough & Notes Dungeons & Maps Rewards Images Dialog Update History |
| Aerbax's Prodigal Drudge | |
|---|---|
| Level: | Any |
| Rec. Level: | 75+ |
| Type: | Fellowship |
| Starts With: | Jarvis Hammerstone (Optional) |
| Starts At: | 25.6N, 49.4E in Cragstone |
| Repeat: | 20 Hours |
| Contracts: | Contract for Aerbax's Prodigal Drudge |
Overview Edit
- Investigate the Drudge Fort near Cragstone for Jarvis Hammerstone.
- Prerequisites
- Before heading to the Drudge Fort make sure you have multiple food items to feed Sergeant Shanks in step 3 and Farmer Kao's Shovel for step 4. Most groups choose to omit these steps and instead have someone PKL through the cave door. If your group is doing this, skip steps 3 and 4.
Walkthrough & Notes Edit
- Jarvis Hammerstone will inform you of a Drudge Fort west of Cragstone at 25.4N 45.9E.
- Head to the fort, destroy the walls, and work your way to the inner ring of the fortress. You will find two NPCs: Sergeant Shanks the Drudge and Hoogan the Banderling. There is also a cave with a locked door.
- Give Sergeant Shanks food items until he slips and tells you about the blueprints. This flags you to pick up the Drudge Fort Blueprints dropped by the Drudge Biters surrounding the cave entrance. You only need to get flagged once per character and then they can pick up blueprints forever. Not many of the Drudge Biters drop the blueprints, so you may need to do some searching to find them.
- Bring the blueprints to Hoogan the Banderling, barricaded inside the small hut. Note that you cannot enter the hut, instead you must interact with Hoogan via the small window in the back of the hut. Give him the blueprints and he will tell you that he requires a shovel to escape. There is a rumor sitting in a pile of trash and stolen loot which will lead you to Farmer Kao, the owner of the only shovel in Dereth. It saves time to get Farmer Kao's Shovel before the quest. Give the shovel to Hoogan in return for the Cave Door Key.
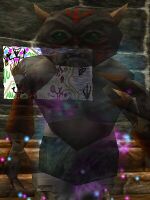
- Use the Cave Door Key to access the Cave Dungeon. You will enter in a tunnel which connects to a large chamber. Opposite of you will be a portal to the next area. In order to enter it, you must first kill Kernel Klank. This will release the restrictions on the portal which takes you to the main and final dungeon, Under Drudge Fort.
- Under Drudge Fort is a large maze, but experienced players will know the way through. If no one knows the way, study the map carefully. Eventually you will jump down to the lower level where Bonecrunch is.
- If you don't have the map: Once your portal to the lower dungeon, go straight until you hit a wall; go right 90 degrees until you hit a wall; go left and stay left until you go down a ramp; at the bottom of the ramp, stay right until you reach a balloon and a jump down.
- When you reach the final room, there is one important thing to remember: Do not kill Captain Burnja. Killing Burnja puts out the Wall of Fire and lets Bonecrunch into the main room where he can and will lay waste to the entire group with his high hollow damage. The general strategy for the final room is this:
- Have one ore more players lead Burnja off to a side room and hold him there until Bonecrunch dies.
- Have an archer open the door behind the fire wall and lure Bonecrunch with an arrow.
- Have all archers and mages open fire on Bonecrunch. Slashing ammo with a rending bow is said to be best.
- Melees keep the spawns of drudges clear so the archers/mages can stay alive and concentrate on Bonecrunch.
- If anyone dies, they can portal recall and land at the top of the Under Drudge Fort
- When Bonecrunch dies, it is then safe to kill Captain Burnja. Once Burnja is dead and the flame wall is down, have everyone in the fellowship loot Bonecrunch's Chest Key from his corpse.
- Captain Burnja carries 1 special board with nail that can also be turned in for a small amount of XP. He also drops Burnja Token that can be given in for a title reward.
- Once everyone has a key, exit the dungeon using the Escape Portal that appears behind Bonecrunch's throne. Using this portal is what flags you to get a reward from Jarvis.
- Close the chest, if open, and then unlock it using your key.
- Tip: You can tell what item is in the chest by looking at the burden:
- Orb = 9140 BU
- Scroll = 9070 BU
- Hammer = 9840 BU
- Tip: You can tell what item is in the chest by looking at the burden:
- When finished, use the surface portal and run back to Cragstone and speak with Jarvis for experience and a random title reward.
- Optional: Unwanted items can be traded or turned in for bonus experience.
Notes
- If you have more than 1 fellowship, you will need to kill Bonecrunch more than 1 time so everyone gets a key. To do this safely, everyone should move back to one of the side rooms and wait for Bonecrunch and Burnja to respawn. If you do not, there is a chance that Bonecrunch will get beyond the flame wall before it can respawn.
Dungeons & Maps Edit
| Dungeon | Coordinates | Wiki Map | ACmaps |
|---|---|---|---|
| Drudge Fort Cave | 25.4N, 45.9E | -- | |
| Under Drudge Fort | N/A | -- | |
| Bonecrunch's Treasury | N/A | -- |
Rewards Edit
Items Edit
| Loot Bonecrunch's Chest | |
|---|---|
| Items: | |
| |
| Loot Captain Burnja | |
|---|---|
| Items: | |
| Speak to Jarvis Hammerstone after entering Escape Portal. | |
|---|---|
| Experience: | 344,000,000 (50% up to level 180) |
| Quest Repeat: | 147,000,000 (20% up to level 180) |
| Titles: | Random: "Cragstone Knight" OR "Guardian of Cragstone" |
| Give unwanted reward from Bonecrunch's Chest to Jarvis Hammerstone | |
|---|---|
| Experience: | 66,000,000 (10% up to level 180) |
| Hand Burnja's Board with Nails to Jarvis Hammerstone. | |
|---|---|
| Experience: | 66,000,000 (10% up to level 180) |
| Quest Repeat: | 1,839,776 (3% up to level 90) |
| Give Burnja Token to Jarvis Hammerstone | |
|---|---|
| Titles: | Cragstone Firefighter |
| Give Farmer Kao's Shovel to Hoogan | |
|---|---|
| Titles: | Hoogan's Hero |
Images Edit
Click image for full size version.
-
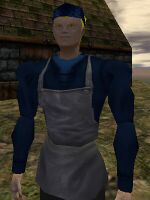
Jarvis Hammerstone
-
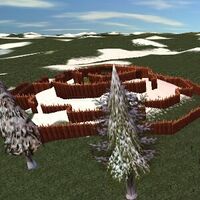
Drudge Fort
-
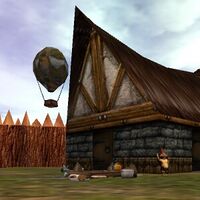
The house where Hoogan is prisoner and guarded by Sergeant Shanks.
-
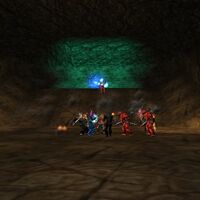
Kernel Klank
-
Fire wall that falls when Burnja dies.
-
Bonecrunch
Dialog Edit
Opening Dialog Edit
- Jarvis Hammerstone tells you, "We've driven those theiving Drudges back to their fort! but I'm worried they're still planning something..."
- Jarvis lowers his voice to a whisper.
- Jarvis Hammerstone tells you, "Alot of help those Royal Guard were, just standing around and sending messages back and forth!"
- Jarvis Hammerstone tells you, "The Healer, Avalenne, says she can see Drudges patrolling their fort west of town."
- Jarvis Hammerstone tells you, "The Cragstone Elders have charged me with the task of getting rid of the drudges and I will reward you well if you can discover what they're doing in that fort of theirs."
Sergeant Shanks Edit
- Sergeant Shanks tells you, "I no talk to you. You are not Drudge and I told not to talk to not Drudge!"
Handing in Drudge Fort Blueprints to Hoogan Edit
- You give Hoogan Drudge Fort Blueprints.
- Hoogan looks the blueprints over.
- Hoogan tells you, "Alright, we know we need to dig to avoid these tunnels the Drudges dug here and here, but we don't have anything to dig with. If we had a shovel we could really get out of here."
- Hoogan tells you, "Can you find us a shovel? I don't know what the drudges used to dig their tunnels, but maybe you can find a clue around. If you bring me back a shovel I'll give you this key we slipped off of Shanks when he was sleeping today. I think it leads into their tunnels below."
- Hoogan tells you, "Remember, if you find a shovel be sure not to give it to anyone else. Bring it to me."
Handing in Farmer Kao's Shovel to Hoogan Edit
- You allow Hoogan to examine your Farmer Kao's Shovel.
- You hand over 1 of your Farmer Kao's Shovels.
- Hoogan bestows the title "Hoogan's Hero" on you.
- Hoogan tells you, "Perfect! With this we can finish the tunnel we've been clawing and scrapping out under the bed in here. You've saved my skin friend. Take this key and bring the fight to the Drudges in their tunnels and caves below."
- Hoogan gives you Cave Door Key.
- Hoogan tells you, "The tunneling is going much faster now that we have the shovel you brought us. You should use that key I gave you to get into the Drudges under ground caves. I'm pretty sure their leader is down there. At least that's what Shanks let slip :the other day. Thanks again human and good luck."
Bonecrunch Edit
- Bonecrunch says, "Stay away from my apples!"
- Bonecrunch says, "You! How did you get into my fortress? Never mind, now it's time for you to go crunch!"
- Bonecrunch says, "This is my throne room. I am BoneCrunch and that's my throne. There, tours over, now you die."
- Bonecrunch says, "Your time as masters of this land is at an end humans. You have no idea what is coming."
- Bonecrunch says, "You have defeated my child. Your kind shows just as much promise as the Martine creature did. Soon you will embrace the simple truth. Clarity and purpose will be paid for with free will."
- Bonecrunch says, "Your not part of the Plan!"
- Bonecrunch says, "What? You call this loot? How come I never get your weapons?"
- Bonecrunch says, "Come! Protect your leader! Bite! Stab! Burn!"
Captain Burnja Edit
- Captain Burnja tells you, "Leave now humans or I burn you so bad you be dead!"
Returning to Jarvis Hammerstone Edit
- Jarvis Hammerstone tells you, "Ah, I see you bested the Drudge leader, Bonecrunch, again. Well done! His sudden rise to power still worries me though."
- Jarvis Hammerstone tells you, "The Royal Council is investigating the various creature uprisings in Dereth. It seems that the Mosswarts and Banderling have also been acting a bit odd lately. These are troubling times. I am glad that we have brave souls like you to protect our people."
- Jarvis Hammerstone tells you, "For your continued bravery and service to Cragstone I grant you the wisdom of the Town Elders of Cragstone and the title "Cragstone Knight.""
- You've earned (20%) experience.
Handing in Burnja Token Edit
- You give Jarvis Hammerstone Burnja Token.
- Jarvis Hammerstone tells you, "Ah, this is from that pyro-maniacal Drudge. I never did buy him as the leader of the raids."
- Jarvis Hammerstone tells you, "Still, I'm glad you were able to defeat him. I'm so tired of trying to put out all the fires he keeps starting."
- Jarvis Hammerstone tells you, "I hereby name you a "Cragstone Firefighter.""
Handing in Protective Drudge Charms Edit
- You allow Jarvis Hammerstone to examine your Protective Drudge Charm.
- You hand over 1 of your Protective Drudge Charms.
- Jarvis Hammerstone tells you, "This is one of BoneCrunch's treasures? It looks like some of the other Drudge Charms I've seen, but it's obviously more powerful. I'll have Suya the Jeweler take a look at it. Thank you, here is a small reward for your help."
- You've earned 66,000,000 experience. (Level 200)
Handing in Burnja's Board with Nails Edit
- You give Jarvis Hammerstone Burnja's Board with Nails.
- Jarvis Hammerstone tells you, "This is the weapon that Drudge you called Burnja was wielding? Not very sophisticated is it?"
- Jarvis Hammerstone tells you, "I'm sure I can find someone who will buy this. Here have some of my writings on economics in a Post-Magical Revolutionary society."
- You've earned 1,839,776 experience.
Update History Edit
|
