Virindi Servant's Amulet Quest: Difference between revisions
>Arkalor's Bot m (Text replace - "{{Quest Summary Temp" to "{{Quest Summary") |
mNo edit summary |
||
| (One intermediate revision by the same user not shown) | |||
| Line 1: | Line 1: | ||
{{Quest Summary | {{Quest Summary | ||
| Level = 36 | | Level = 36{{!}}36, 41 | ||
| Recommended Level = | | Recommended Level = | ||
| Quest Type = Small Fellowship | | Quest Type = Small Fellowship | ||
| Starts With = [[Chosen of Asheron]] | | Starts With = {{Optional}} [[Chosen of Asheron]] | ||
| Starts At = [[Cragstone]] / [[Hebian-To]] / [[Zaikhal]] | | Starts At = {{Optional}} [[Cragstone]] / [[Hebian-To]] / [[Zaikhal]] | ||
| Repeat Timer = 20 Hours | | Repeat Timer = 20 Hours | ||
| Time to Complete = | | Time to Complete = | ||
| Line 20: | Line 19: | ||
# See the [[#Maps|map]] for details on door and lever placement. | # See the [[#Maps|map]] for details on door and lever placement. | ||
#* Note: One of the door opening triggers is activated by running between 2 large crystals. | #* Note: One of the door opening triggers is activated by running between 2 large crystals. | ||
# At the end of the Upper part the {{ | # At the end of the Upper part the {{Itemlink|Fragment of the Singularity}} is on the ground and respawns every couple of minutes. | ||
# At the end of the Lower part is the [[Chakron Flux Servant]] that drops the {{ | # At the end of the Lower part is the [[Chakron Flux Servant]] that drops the {{Itemlink|Virindi Servant's Amulet}} and respawns every couple of minutes. | ||
# After everyone has looted the amulet do not take the exit portal, last recall instead to return you to the top where a portal will take you to the two portal room so you can switch dungeons (there's both an exit and dungeon portal so be sure to take the right one). | # After everyone has looted the amulet do not take the exit portal, last recall instead to return you to the top where a portal will take you to the two portal room so you can switch dungeons (there's both an exit and dungeon portal so be sure to take the right one). | ||
Notes | Notes | ||
* If you visit the optional quest starter, [[Chosen of Asheron]], he will hand you the texts: {{ | * If you visit the optional quest starter, [[Chosen of Asheron]], he will hand you the texts: {{Itemlink|Asheron's Second Missive}} and {{Itemlink|Instructions (Sepulcher of the Hopeslayer)|Instructions}}. | ||
== Dungeons & Maps == | == Dungeons & Maps == | ||
| Line 51: | Line 50: | ||
== Rewards == | == Rewards == | ||
=== | {{Rewards Table | ||
{{ | | Quest Task = Lower Chakron Flux | ||
| | | Item Reward = | ||
| Fragment of the Singularity | * {{Itemlink|Virindi Servant's Amulet|Mode=icon}} | ||
| Max XP Reward = | Percent of Level = | Level Cap = | |||
| Repeat Max XP Reward = | Repeat Percent of Level = | Repeat Level Cap = | |||
| Luminance Reward = | |||
| Title Reward = | |||
| Other Reward = | |||
}} | |||
{{Rewards Table | |||
| Quest Task = Upper Chakron Flux | |||
| Item Reward = | |||
* {{Itemlink|Fragment of the Singularity|Mode=icon}} | |||
| Max XP Reward = | Percent of Level = | Level Cap = | |||
| Repeat Max XP Reward = | Repeat Percent of Level = | Repeat Level Cap = | |||
| Luminance Reward = | |||
| Title Reward = | |||
| Other Reward = | |||
}} | }} | ||
| Line 66: | Line 81: | ||
== Dialog == | == Dialog == | ||
{{Dialog| | |||
;Opening Dialog | |||
|Chosen of Asheron tells you, "My lord conveys his gratitude for the efforts of your people. If you are one of the champions who took part in the defeat of Bael'Zharon, I can take your Soul Crystal Gem and give you a spellcasting staff to commemorate your achievement. | |||
|Chosen of Asheron gives you Asheron's Second Missive | |||
|Chosen of Asheron tells you, "Also, I have instructions here that will lead you to the site of the Hopeslayer's defeat, should you wish to visit it. | |||
|Chosen of Asheron gives you Instructions. | |||
}} | |||
== Update History == | == Update History == | ||
| Line 85: | Line 102: | ||
* Repeat timer changed from 20 days to 20 hours. | * Repeat timer changed from 20 days to 20 hours. | ||
}} | }} | ||
[[Category:Quests: Level 41]] | |||
Latest revision as of 13:21, 17 February 2015
| Walkthrough & Notes Dungeons & Maps Rewards Images Dialog Update History |
| Virindi Servant's Amulet Quest | |
|---|---|
| Level: | 36, 41 |
| Type: | Small Fellowship |
| Starts With: | Optional: Chosen of Asheron |
| Starts At: | Optional: Cragstone / Hebian-To / Zaikhal |
| Repeat: | 20 Hours |
Overview Edit
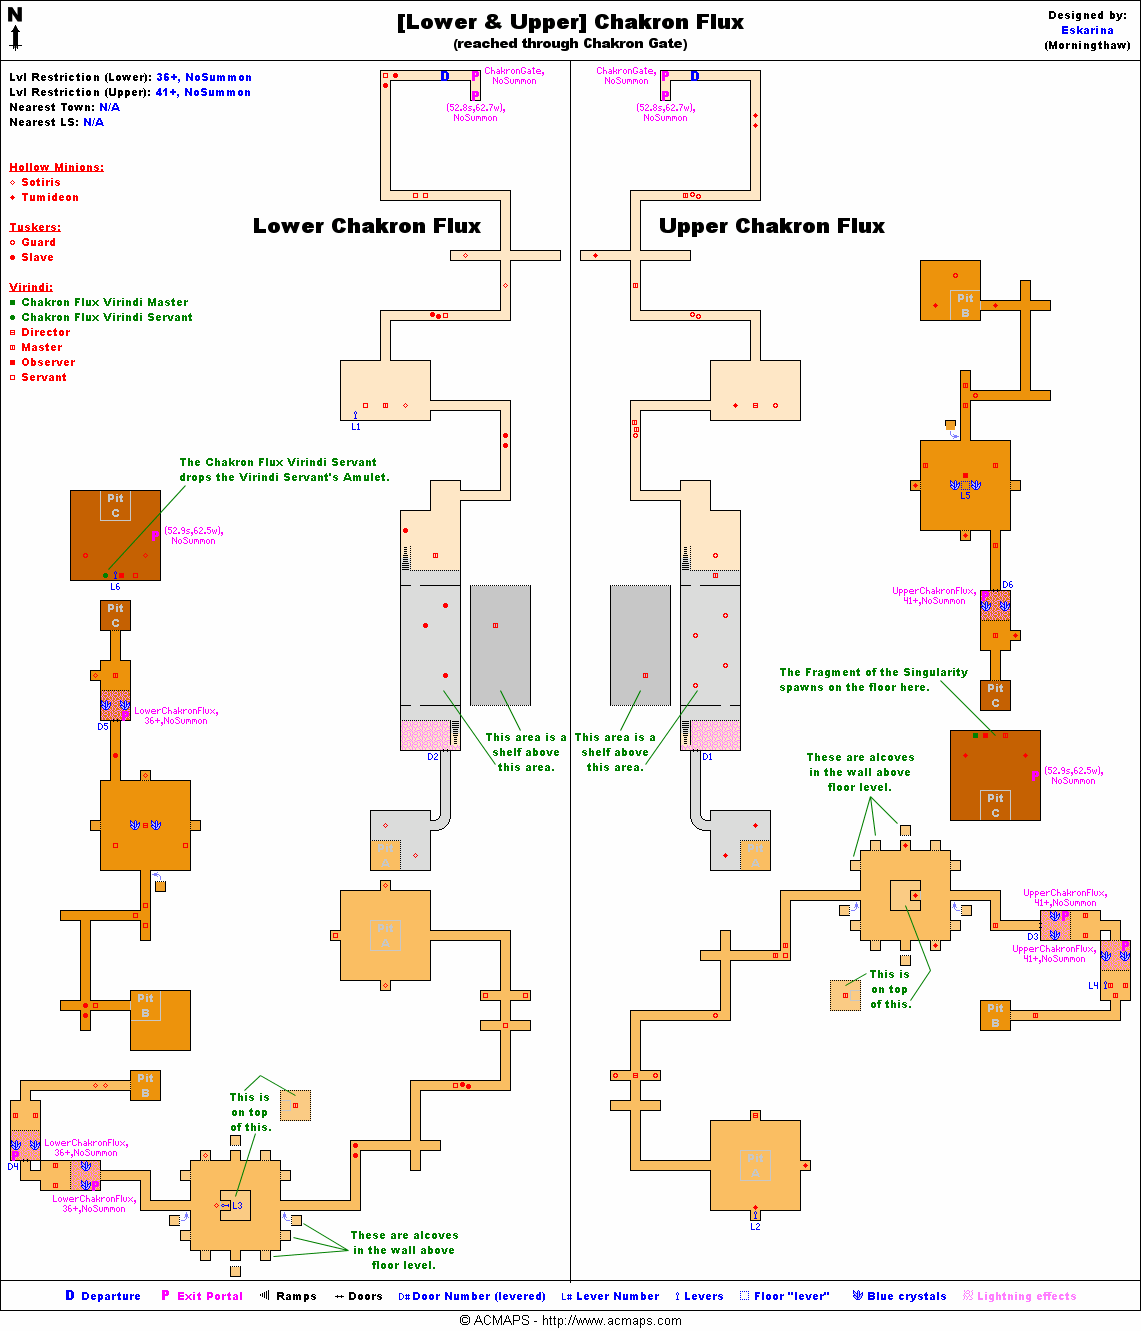
Half way through this quest the dungeon splits and each path has doors opened with levers in the other dungeon so at least two people are needed to open doors for each other. Each path has one of the two rewards so if both are wanted the groups must reverse and do both paths once.
Walkthrough & Notes Edit
- From the Obsidian Rim, run to the Chakron Gate dungeon at 52.9S, 62.7W.
- Route: Access up the mountain is at 54.5S, 63.8W
- The dungeon is symmetrical so you can either stick left or stick right and you will eventually come to a room with two portals.
- At this point the group must divide. The Upper part contains the shard and the Lower part contains the amulet. To get both parts you will need to reverse after doing once.
- See the map for details on door and lever placement.
- Note: One of the door opening triggers is activated by running between 2 large crystals.
- At the end of the Upper part the Fragment of the Singularity is on the ground and respawns every couple of minutes.
- At the end of the Lower part is the Chakron Flux Servant that drops the Virindi Servant's Amulet and respawns every couple of minutes.
- After everyone has looted the amulet do not take the exit portal, last recall instead to return you to the top where a portal will take you to the two portal room so you can switch dungeons (there's both an exit and dungeon portal so be sure to take the right one).
Notes
- If you visit the optional quest starter, Chosen of Asheron, he will hand you the texts: Asheron's Second Missive and Instructions.
Dungeons & Maps Edit
| Dungeon | Coordinates | Wiki Map | ACmaps |
|---|---|---|---|
| Chakron Gate | 52.9S, 62.7W | -- | 02AE |
| Lower Chakron Flux | Chakron Gate | -- | 02AF |
| Upper Chakron Flux | Chakron Gate | -- | 02AF |
Rewards Edit
| Lower Chakron Flux | |
|---|---|
| Items: | |
| Upper Chakron Flux | |
|---|---|
| Items: | |
Images Edit
Click image for full size version.
-
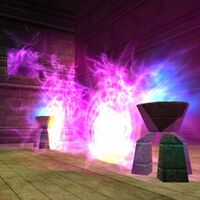
Chakron Flux portals
-
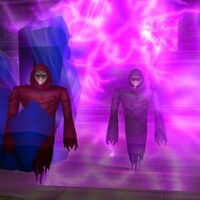
Virindi Inquisitor & Preceptor
-
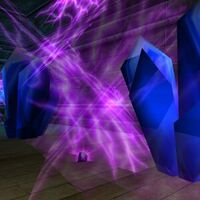
Fragment of the Singularity


Dialog Edit
- Opening Dialog
- Chosen of Asheron tells you, "My lord conveys his gratitude for the efforts of your people. If you are one of the champions who took part in the defeat of Bael'Zharon, I can take your Soul Crystal Gem and give you a spellcasting staff to commemorate your achievement.
- Chosen of Asheron gives you Asheron's Second Missive
- Chosen of Asheron tells you, "Also, I have instructions here that will lead you to the site of the Hopeslayer's defeat, should you wish to visit it.
- Chosen of Asheron gives you Instructions.
Update History Edit
|