Clutch of Kings (Keerik): Difference between revisions
m (→Lore & Dialog) |
|||
| (36 intermediate revisions by 3 users not shown) | |||
| Line 1: | Line 1: | ||
{{Links Header|'''[[Clutch of Kings]]''' | |||
| | |||
[[Clutch of Kings (Reeshan)|Reeshan]] - [[Clutch of Kings (Kiree)|Kiree]] - [[Clutch of Kings (Broodu)|Broodu]] - Keerik - [[Clutch of Kings (Rehir)|Rehir]] - [[Clutch of Kings (Browerk)|Browerk]]}} | |||
{{Quest Summary | |||
| Level = 60 | |||
| Recommended Level = | |||
| Quest Type = Fellowship | |||
| Starts With = [[Watcher of the Dead]] | |||
| Starts At = 51.4S, 67.9W | |||
| Route = [[Obsidian Rim]] | |||
| Repeat Timer = 20 Hours | |||
| Time to Complete = | |||
| Contracts = [[Contract for Clutch of Kings: Keerik]] | |||
}} | |||
== Overview == | |||
* This is the fourth of six quests in the [[Clutch of Kings]], or [[Clutch of Kings|Burun Kings]], series of quests. | |||
* You will be facing Burun Ruuks and Burun Guruks in both dungeons and with the boss. All the monsters are commonly weak to frost and additionally a [[Critical Strike]] weapon will be needed for the boss fight. | * You will be facing Burun Ruuks and Burun Guruks in both dungeons and with the boss. All the monsters are commonly weak to frost and additionally a [[Critical Strike]] weapon will be needed for the boss fight. | ||
*The Subway Portal Room portal has a to Obsidian Rim. | |||
== | == Walkthrough & Notes == | ||
=== Part 1: Depth's of Hizk Ri's Temple === | |||
# Speak to the Watcher of the Dead to be portaled into the [[Depth's of Hizk Ri's Temple]]. | |||
# Take the Northeast exit from this room, noticeable by a broken in Falatacot door sitting at an angle in the hall. | |||
# Right away you will come to a door beyond an intersection, head through the door and at the end of the path beyond it turn to your left and head into the passage next to you. Head through the door here and down the ramp. | |||
# You will now be in a rather large room with many exits. The exits on the East and West walls both lead to rooms with levers inside, hit them to open doors back inside the big room, you can get into the rooms via plates on the floor that open the doors (there are plates inside the rooms that close the doors too, so be wary of them when you run back out). | |||
# Take either door (You only need one) on the South wall and then head up the ramp past the door to get to the portal. | |||
== | === Part 2: Secrets of Hizk Ri's Temple === | ||
# | # From the drop, walk to one of the 4 [[Shell Table]]s throughout the room. | ||
# | # Use the table, and then watch as the cups switch positions randomly, always keeping an eye on which cup is covering the shell. | ||
# | #* Tip: Move your camera into aerial mode in order to get a better view of the movements. | ||
# Once the cups stop moving, pick up shell from the floor that most represents where it is on the table, then hand it back to the [[Shell Table]]: | |||
## {{Itemlink|Left Shell}} | |||
## {{Itemlink|Center Shell}} | |||
## {{Itemlink|Right Shell}} | |||
# If you receive a success message, take the portal on the north wall to move on to the next part. | |||
#* Note: If you fail, talk to the Shell Table in order to attempt to solve the puzzle again. | |||
== | === Part 3: Hizk Ri's Temple === | ||
# | # From the drop, head East and hug the left wall all the way to the end (make sure to head down in the grated area), there are no misdirections other than that, and no levers. | ||
# | # At the end, you'll find a hallway on the east wall, which leads to a Portal Gateway. The device leads to [[Keerik]], the boss. | ||
== | === Part 4: Center of Hizk Ri's Temple === | ||
== | |||
# The drop is hot so check your buffs before entering. | # The drop is hot so check your buffs before entering. | ||
# [[Keerik]] can be seen across the room and will attack when he or his minions are attacked. | # [[Keerik]] can be seen across the room and will attack when he or his minions are attacked. | ||
# | # Once you kill Keerik, loot [[Keerik's Hide]] from the floor. | ||
# Speak to [[Guard Sorchia]] at 25.7N, 48.9E in [[Cragstone]] for your XP and random reward. | |||
# {{Optional}} Hand Keerik's Hide to Guard Sorchia for the title of ''Keerik Killer''. | |||
#* Note: Hold on to the hide if you are trying to obtain the ''Kingslayer'' title. See the [[Clutch of Kings]] for more information. | |||
== Dungeons & Maps == | |||
{{Dungeon Table | |||
| Table Rows = | |||
{{Dungeon Maps | |||
| Dungeon = Depth's of Hizk Ri's Temple | |||
| Coordinates = 51.4S, 67.9W | |||
| Wiki Map File = | |||
| ACmaps ID = 00FD | |||
}} | |||
{{Dungeon Maps | |||
| Dungeon = Secrets of Hizk Ri's Temple | |||
| Coordinates = N/A | |||
| Wiki Map File = | |||
| ACmaps ID = 0160 | |||
}} | |||
{{Dungeon Maps | |||
| Dungeon = Hizk Ri's Temple | |||
| Coordinates = N/A | |||
| Wiki Map File = | |||
| ACmaps ID = 01F0 | |||
}} | |||
{{Dungeon Maps | |||
| Dungeon = Center of Hizk Ri's Temple | |||
| Coordinates = N/A | |||
| Wiki Map File = | |||
| ACmaps ID = 00F7 | |||
}} | |||
}} | |||
== | == Rewards == | ||
{{Rewards Table | |||
| Quest Task = Defeat Keerik and speak to Guard Sorchia | |||
| Item Reward = | |||
* {{Itemlink|Mana Forge Key|Mode=icon}} (Level 125 and above reward) | |||
One of the following random rewards: | |||
* | * {{Itemlink|Outland Portal Device|Mode=icon}} | ||
* {{Itemlink|Enscorcelled Robe|Mode=icon}} | |||
* {{Itemlink|Gem of Perfect Balance|Mode=icon}} | |||
* | * {{Itemlink|Salvaged Aquamarine (Quest)|Salvaged Aquamarine|Mode=icon}} | ||
* | * {{Itemlink|Salvaged Emerald (Quest)|Salvaged Emerald|Mode=icon}} | ||
* | | Max XP Reward = 56,184,660 | ||
* | | Percent of Level = 33 | ||
| Level Cap = 130 | |||
}} | |||
== | {{Rewards Table | ||
| Quest Task = Give Keerik's Hide to Guard Sorchia | |||
| Item Reward = | |||
| Max XP Reward = | Percent of Level = | Level Cap = | |||
| Repeat Max XP Reward = | Repeat Percent of Level = | Repeat Level Cap = | |||
| Luminance Reward = | |||
| Title Reward = Keerik Killer | |||
| Other Reward = | |||
}} | |||
== Images == | == Images == | ||
<gallery widths=200px heights=200px perrow=3> | |||
File:Clutch of Kings (Keerik) 1 Live.jpg|[[Shell Table]] game and exit portal | |||
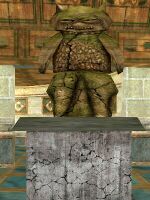
File:Clutch of Kings (Keerik) Live.jpg|King Keerik | |||
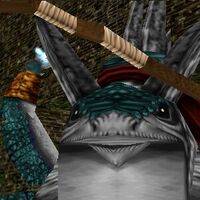
File:Clutch of Kings (Keerik) 2 Live.jpg|Inside [[Keerik]]'s stomach | |||
File:Clutch of Kings (Keerik) 3 Live.jpg|[[Keerik]]'s Lair after his defeat (note the hides on the floor) | |||
File:Outland Portal Device Live.jpg|Outland Portal Device | |||
File:Enscorcelled Robe Live.jpg|Enscorcelled Robe | |||
</gallery> | |||
== Dialog == | |||
{{Dialog| | |||
;Watcher of the Dead | |||
|Watcher of the Dead tells you, "My purpose is plain, I watch the dead that reside within the halls of this temple. I have stood this vigil since my sacrifice over thirty thousand years ago, when the world cooled and the darkness made war upon all. The weight of time has long crushed my bones to dust and left with me with this incorporeal form. Yet, I serve my purpose with the same vigor that I did in life." | |||
|Watcher of the Dead tells you, "I will not find rest until the threat from beyond is quashed. They will spread like a plague across this world if they are not shattered. Great waves of magic shall crash against their flesh and be pulled into their bodies. Their strength will grow until they can no longer be touched and then all shall be lost beneath the weight of their power. | |||
|"Watcher of the Dead tells you, "A great failure for our sisterhood. They grew where our chosen fell. Now they come to shattered the coil of this world as we shattered the coil of theirs. You must defeat the behemoth within these halls else its power grow until it is unchecked by any force that remains on this world." | |||
}} | |||
== | == Update History == | ||
{{Update History| | |||
[[On Bended Knee]] | |||
* Quest introduced. | |||
[[Unfinished Business]] | |||
* [[Mana Forge Key]] added to high level rewards. | |||
[[ | [[The Quest for Freedom]] | ||
* Repeat timer changed from 20 days to 20 hours. | |||
}} | |||
Latest revision as of 12:55, 12 September 2024
| Walkthrough & Notes Dungeons & Maps Rewards Images Dialog Update History |
| Clutch of Kings (Keerik) | |
|---|---|
| Level: | 60 |
| Type: | Fellowship |
| Starts With: | Watcher of the Dead |
| Starts At: | 51.4S, 67.9W |
| Route: | Obsidian Rim |
| Repeat: | 20 Hours |
| Contracts: | Contract for Clutch of Kings: Keerik |
Overview Edit
- This is the fourth of six quests in the Clutch of Kings, or Burun Kings, series of quests.
- You will be facing Burun Ruuks and Burun Guruks in both dungeons and with the boss. All the monsters are commonly weak to frost and additionally a Critical Strike weapon will be needed for the boss fight.
- The Subway Portal Room portal has a to Obsidian Rim.
Walkthrough & Notes Edit
Part 1: Depth's of Hizk Ri's Temple Edit
- Speak to the Watcher of the Dead to be portaled into the Depth's of Hizk Ri's Temple.
- Take the Northeast exit from this room, noticeable by a broken in Falatacot door sitting at an angle in the hall.
- Right away you will come to a door beyond an intersection, head through the door and at the end of the path beyond it turn to your left and head into the passage next to you. Head through the door here and down the ramp.
- You will now be in a rather large room with many exits. The exits on the East and West walls both lead to rooms with levers inside, hit them to open doors back inside the big room, you can get into the rooms via plates on the floor that open the doors (there are plates inside the rooms that close the doors too, so be wary of them when you run back out).
- Take either door (You only need one) on the South wall and then head up the ramp past the door to get to the portal.
Part 2: Secrets of Hizk Ri's Temple Edit
- From the drop, walk to one of the 4 Shell Tables throughout the room.
- Use the table, and then watch as the cups switch positions randomly, always keeping an eye on which cup is covering the shell.
- Tip: Move your camera into aerial mode in order to get a better view of the movements.
- Once the cups stop moving, pick up shell from the floor that most represents where it is on the table, then hand it back to the Shell Table:
- If you receive a success message, take the portal on the north wall to move on to the next part.
- Note: If you fail, talk to the Shell Table in order to attempt to solve the puzzle again.
Part 3: Hizk Ri's Temple Edit
- From the drop, head East and hug the left wall all the way to the end (make sure to head down in the grated area), there are no misdirections other than that, and no levers.
- At the end, you'll find a hallway on the east wall, which leads to a Portal Gateway. The device leads to Keerik, the boss.
Part 4: Center of Hizk Ri's Temple Edit
- The drop is hot so check your buffs before entering.
- Keerik can be seen across the room and will attack when he or his minions are attacked.
- Once you kill Keerik, loot Keerik's Hide from the floor.
- Speak to Guard Sorchia at 25.7N, 48.9E in Cragstone for your XP and random reward.
- Optional: Hand Keerik's Hide to Guard Sorchia for the title of Keerik Killer.
- Note: Hold on to the hide if you are trying to obtain the Kingslayer title. See the Clutch of Kings for more information.
Dungeons & Maps Edit
| Dungeon | Coordinates | Wiki Map | ACmaps |
|---|---|---|---|
| Depth's of Hizk Ri's Temple | 51.4S, 67.9W | -- | 00FD |
| Secrets of Hizk Ri's Temple | N/A | -- | 0160 |
| Hizk Ri's Temple | N/A | -- | 01F0 |
| Center of Hizk Ri's Temple | N/A | -- | 00F7 |
Rewards Edit
| Defeat Keerik and speak to Guard Sorchia | |
|---|---|
| Experience: | 56,184,660 (33% up to level 130) |
| Items: | |
One of the following random rewards: | |
| Give Keerik's Hide to Guard Sorchia | |
|---|---|
| Titles: | Keerik Killer |
Images Edit
-

Shell Table game and exit portal
-
King Keerik
-

Inside Keerik's stomach
-

Keerik's Lair after his defeat (note the hides on the floor)
-
Outland Portal Device
-

Enscorcelled Robe
_1_Live.jpg)
_Live.jpg)
_2_Live.jpg)
_3_Live.jpg)


Dialog Edit
- Watcher of the Dead
- Watcher of the Dead tells you, "My purpose is plain, I watch the dead that reside within the halls of this temple. I have stood this vigil since my sacrifice over thirty thousand years ago, when the world cooled and the darkness made war upon all. The weight of time has long crushed my bones to dust and left with me with this incorporeal form. Yet, I serve my purpose with the same vigor that I did in life."
- Watcher of the Dead tells you, "I will not find rest until the threat from beyond is quashed. They will spread like a plague across this world if they are not shattered. Great waves of magic shall crash against their flesh and be pulled into their bodies. Their strength will grow until they can no longer be touched and then all shall be lost beneath the weight of their power.
- "Watcher of the Dead tells you, "A great failure for our sisterhood. They grew where our chosen fell. Now they come to shattered the coil of this world as we shattered the coil of theirs. You must defeat the behemoth within these halls else its power grow until it is unchecked by any force that remains on this world."
Update History Edit
|