Return to Frore: Difference between revisions
(Clarification on the directions to the scribe) |
m (update location of the Crystal Device) |
||
| (5 intermediate revisions by 3 users not shown) | |||
| Line 26: | Line 26: | ||
# Inside Mountain Cavern, hand the book to the nearby Quiddity Seed. | # Inside Mountain Cavern, hand the book to the nearby Quiddity Seed. | ||
# Take all lefts from the jump down and you will be brought directly to the end of the dungeon. | # Take all lefts from the jump down and you will be brought directly to the end of the dungeon. | ||
# Kill the Ferundi, one person needs to loot the | # Kill the Ferundi, one person needs to loot the Frore Device Legs and the key and head to the nearby locked door. | ||
# To open the lever doors, one must step on the three pressure plates that are found at the center of the three standing stone rings found in three larger cave chambers, located after the maze and before the city. | # To open the lever doors, one must step on the three pressure plates that are found at the center of the three standing stone rings found in three larger cave chambers, located after the maze and before the city. | ||
#* {{warning}} If soloing, the magical portals beyond the doors take you to each of the three pressure plates. It is possible to use each portal and run back to the doors before they close. After you pass the first of the three pressure doors, you can close and reopen them using the buttons on the walls to reset the timers and give you some more time. The timers are more generous then they used to be and as long as you hurry, you should have no problem getting them in one run. Note: When soloing take note: You can double back and reset the timers on the doors by opening all previous doors JUST before running through the next portal. Also, the 3rd portal drops you in a different location than the first two. From the third portal drop, run east first and then down. | #* {{warning}} If soloing, the magical portals beyond the doors take you to each of the three pressure plates. It is possible to use each portal and run back to the doors before they close. After you pass the first of the three pressure doors, you can close and reopen them using the buttons on the walls to reset the timers and give you some more time. The timers are more generous then they used to be and as long as you hurry, you should have no problem getting them in one run. Note: When soloing take note: You can double back and reset the timers on the doors by opening all previous doors JUST before running through the next portal. Also, the 3rd portal drops you in a different location than the first two. From the third portal drop, run east first and then down. | ||
# When everyone is through, enter the [[Lost City of Frore]]. | # When everyone is through, enter the [[Lost City of Frore]]. | ||
# Fight the undead, have the same person that looted the previous | # Fight the undead, have the same person that looted the previous Frore Device Legs loot the Frore Device Base and key from Fenngar and Frisander. | ||
# Unlock the nearby door, proceed down the hallway and jump into the pit. | # Unlock the nearby door, proceed down the hallway and jump into the pit. | ||
# Once in the pit, head down the hole in the floor and take all lefts till you reach an open room. | # Once in the pit, head down the hole in the floor and take all lefts till you reach an open room. | ||
| Line 36: | Line 36: | ||
# Head to the campfire and prepare for a boss fight. Two enemies will spawn and attack you while you're camping. | # Head to the campfire and prepare for a boss fight. Two enemies will spawn and attack you while you're camping. | ||
# Kill the Life mage first because it does devastating spells that can one-shot the unprepared! | # Kill the Life mage first because it does devastating spells that can one-shot the unprepared! | ||
# Once both enemies are dead, have everyone loot a | # Once both enemies are dead, have everyone loot a Shattered Key from on the ground around Fidisa the Agile. When ready, take the nearby Magical Portal. | ||
=== Part 2: The Lost City of Frore === | === Part 2: The Lost City of Frore === | ||
# Once everyone is gathered, head back into the tunnels and take all rights this time. | # Once everyone is gathered, head back into the tunnels and take all rights this time. | ||
# Continue straight from the large room up a ramp, into the next large room. Be on the lookout for a lever up on a bridge. Jump onto the bridge and use the lever. Hop down then head north through the now open doorway. | # Continue straight from the large room up a ramp, into the next large room. Be on the lookout for a lever up on a bridge. Jump onto the bridge and use the lever. Hop down then head north through the now open doorway. | ||
# Head east until you encounter a Virindi Overseer. Once the overseer has | # Head east until you encounter a Virindi Overseer. Once the overseer has been vanquished, head north up a ramp until you come to a doorway overlooking a room. Jump down into the room. | ||
# On the northern end of this large room, you'll find a small room with a ramp heading up. From here, the dungeon is linear. | # On the northern end of this large room, you'll find a small room with a ramp heading up. From here, the dungeon is linear. | ||
# When you come to a large hexagonal room, have the person with the shards combine them and use the crystal in the middle of the room to spawn the boss. | # When you come to a large hexagonal room, have the person with the shards combine them and use the crystal in the middle of the room to spawn the boss. | ||
# The boss fight | # The boss fight consists of The Great Work and some undead. Kill the undead first, then deal with The Great Work. The Great Work's minions may hold a special surprise. | ||
# After the boss fight, everyone loot a | # After the boss fight, everyone loot a Crystal Device from the floor, then talk to the nearby emissary to be rewarded your luminance, experience and MMDs. | ||
# Combine the key everyone looted earlier with the red gem. This will produce a currency you can use to buy things from the nearby chest. Be quick though as it only lasts 10 minutes. | # Combine the key everyone looted earlier with the red gem. This will produce a currency you can use to buy things from the nearby chest. Be quick though as it only lasts 10 minutes. | ||
| Line 62: | Line 62: | ||
| Return to Frore (Lore) | | Return to Frore (Lore) | ||
}} | }} | ||
== Dungeons & Maps == | == Dungeons & Maps == | ||
| Line 98: | Line 97: | ||
| Max XP Reward = ??? | | Max XP Reward = ??? | ||
|Luminance Reward=55,000|Item Reward=Trade Note (250,000)}} | |Luminance Reward=55,000|Item Reward=Trade Note (250,000)}} | ||
{{Rewards Table | |||
| Quest Task = Return to Frore Rewards (Pick 1) | |||
| Item Reward = | |||
* {{Itemlink|Ice Heaume of Frore (Uber)|Mode=icon}} | |||
* {{Itemlink|Frost Golem Essence|Mode=icon}} | |||
* {{Itemlink|Gelidite Golem Essence|Mode=icon}} | |||
* {{Itemlink|Dericost Gem of Luminance|Mode=icon}} | |||
* {{Itemlink|Hammer of Frore (Uber)|Mode=icon}} | |||
* {{Itemlink|Tremblant's Ivory Staff (Uber)|Mode=icon}} | |||
| Max XP Reward = | Percent of Level = | Level Cap = | |||
| Repeat Max XP Reward = | Repeat Percent of Level = | Repeat Level Cap = | |||
| Luminance Reward = | |||
| Title Reward = | |||
| Other Reward = | |||
}} | |||
== Images == | == Images == | ||
Latest revision as of 01:41, 5 August 2025
| Custom Content This page is for custom content on Sundering. |
| Walkthrough & Notes Dungeons & Maps Rewards Images Dialog Update History |
| Return to Frore | |
|---|---|
| Level: | 200+ |
| Rec. Level: | 200+ |
| Type: | Group |
| Starts At: | 66.1N, 51.4E near Bandit Castle |
| Route: | Mountain Cavern is located near Crater Village at 64.1N, 13.2E. |
| Repeat: | 20 Hours |
Overview Edit
- For each person that wants to loot the rewards chest, you will need to obtain a Shattered Key and a Crystal Device. You have one hour to complete this quest.
Walkthrough & Notes Edit
Part 1: Getting the Tome Edit
- Go to Hebian-To and head to Fenza Tan the Scribe nearby at 39.3S, 82.9E.
- Buy the book named Return to Frore.
- Go To Jungle Subway, take the portal for Crater Pathway.
- Route: A portal to Jungle Subway can be found in Haven or Abandoned mines.
- Take the surface portal.
- From the Crater Village drop head to Mountain Cavern at 64.1N, 13.2E
Part 2: The Lost City of Frore Edit
- Inside Mountain Cavern, hand the book to the nearby Quiddity Seed.
- Take all lefts from the jump down and you will be brought directly to the end of the dungeon.
- Kill the Ferundi, one person needs to loot the Frore Device Legs and the key and head to the nearby locked door.
- To open the lever doors, one must step on the three pressure plates that are found at the center of the three standing stone rings found in three larger cave chambers, located after the maze and before the city.
- Warning: If soloing, the magical portals beyond the doors take you to each of the three pressure plates. It is possible to use each portal and run back to the doors before they close. After you pass the first of the three pressure doors, you can close and reopen them using the buttons on the walls to reset the timers and give you some more time. The timers are more generous then they used to be and as long as you hurry, you should have no problem getting them in one run. Note: When soloing take note: You can double back and reset the timers on the doors by opening all previous doors JUST before running through the next portal. Also, the 3rd portal drops you in a different location than the first two. From the third portal drop, run east first and then down.
- When everyone is through, enter the Lost City of Frore.
- Fight the undead, have the same person that looted the previous Frore Device Legs loot the Frore Device Base and key from Fenngar and Frisander.
- Unlock the nearby door, proceed down the hallway and jump into the pit.
- Once in the pit, head down the hole in the floor and take all lefts till you reach an open room.
- In the large open room, clear the monsters and then jump up to the northeast ledge.
- Head to the campfire and prepare for a boss fight. Two enemies will spawn and attack you while you're camping.
- Kill the Life mage first because it does devastating spells that can one-shot the unprepared!
- Once both enemies are dead, have everyone loot a Shattered Key from on the ground around Fidisa the Agile. When ready, take the nearby Magical Portal.
Part 2: The Lost City of Frore Edit
- Once everyone is gathered, head back into the tunnels and take all rights this time.
- Continue straight from the large room up a ramp, into the next large room. Be on the lookout for a lever up on a bridge. Jump onto the bridge and use the lever. Hop down then head north through the now open doorway.
- Head east until you encounter a Virindi Overseer. Once the overseer has been vanquished, head north up a ramp until you come to a doorway overlooking a room. Jump down into the room.
- On the northern end of this large room, you'll find a small room with a ramp heading up. From here, the dungeon is linear.
- When you come to a large hexagonal room, have the person with the shards combine them and use the crystal in the middle of the room to spawn the boss.
- The boss fight consists of The Great Work and some undead. Kill the undead first, then deal with The Great Work. The Great Work's minions may hold a special surprise.
- After the boss fight, everyone loot a Crystal Device from the floor, then talk to the nearby emissary to be rewarded your luminance, experience and MMDs.
- Combine the key everyone looted earlier with the red gem. This will produce a currency you can use to buy things from the nearby chest. Be quick though as it only lasts 10 minutes.
![]() Hasty Note (Bandit Castle)
Hasty Note (Bandit Castle)![]() Brief Note
Brief Note![]() Quick Note
Quick Note![]() The Tremblant Party (Aluvian)
The Tremblant Party (Aluvian)![]() The Tremblant Party (Gharu'ndim)
The Tremblant Party (Gharu'ndim)![]() The Tremblant Party (Sho)
The Tremblant Party (Sho)![]() Legend of Frore
Legend of Frore![]() Our Great Work
Our Great Work![]() The Book of Minesh
The Book of Minesh![]() Yarick's Journal
Yarick's Journal![]() Memorial
Memorial![]() Return to Frore (Lore)
Return to Frore (Lore)
Dungeons & Maps Edit
| Dungeon | Coordinates | Wiki Map | ACmaps |
|---|---|---|---|
| Mountain Cavern | 63.2N, 5.5E | -- | 015D |
| Lost City of Frore | From the Mountain Cavern | -- | 0138 |
Rewards Edit
| City of Frore chest rewards | |
|---|---|
| Items: | |
| Talk to Emissary | |
|---|---|
| Experience: | ??? (??% up to level ??) |
| Luminance: | 55,000 |
| Items: | |
|
Trade Note (250,000) | |
| Return to Frore Rewards (Pick 1) | |
|---|---|
| Items: | |
Images Edit
Click image for full size version.
-
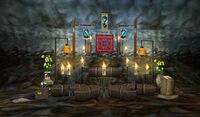
The Lost City of Frore
-
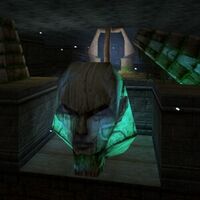
Memorial at start of dungeon.
-
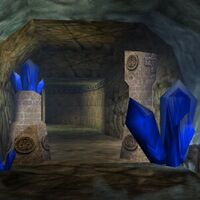
The halls are so cold they do constant damage if you stand in one place.
-
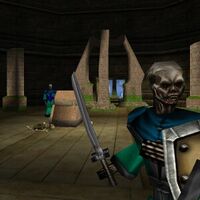
Entering the Lost City of Frore
-
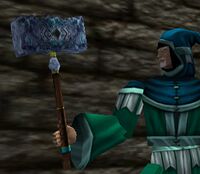
Hammer of Frore
Dialog Edit
- Combining rune transcriptions
- The two transcriptions seem to fit together perfectly, forming a partial message in an ancient language. It appears that some of the message is still missing.
- The three transcriptions seem to fit together perfectly, forming a complete message in an ancient language.
- Handing in Complete Rune Transcription to Kuyiza bint Zayi the Translator
- You give Kuyiza bint Zayi the Translator Complete Rune Transcription.
- Kuyiza bint Zayi the Translator tells you, "Hm. This appears to be a portalspace coordinate. Such things are not within my knowledge. You might want to seek out my colleague Marisa bint Fuya."
- Kuyiza bint Zayi the Translator tells you, "She would be able to cast a portal to this location. Unfortunately, she's on sabbatical, and has gone to the town of Plateau."
- Kuyiza bint Zayi the Translator gives you Gelidite Standing Stone Translation.
- Kuyiza bint Zayi the Translator tells you, "Be warned, though - you will need a substantial party to reach the Lost City, and should you die..."
- Kuyiza bint Zayi the Translator tells you, "You will be unable to reenter the caves to recover your equipment. Be certain you are prepared before you ask Mairisa to cast the portal!"
- Mairisa bint Fuda
- Mairisa bint Fuda tells you, "I came here to be free of the madding pace of the Arcanum at Zaikhal. Unless you have urgent business, I'd prefer to be left to my meditation."
- Mairisa bint Fuda tells you, "If you are another seeking the lost City of Frore, be warned - you will need a substantial party to survive. Should you die, you will be unable to reenter the caves to recover your equipment. Be certain you are prepared."
- Handing in Gelidite Standing Stone Translation
- You give Mairisa bint Fuda Gelidite Standing Stone Translation.
- Mairisa bint Fuda tells you, "Yes, I can provide transit to the location written here. I believe you will have need of this. A passing adventurer threw it at my head some time ago, when my portal spell fizzled."
- Mairisa bint Fuda gives you Gelidite Treasure Key.
- Handing in Glowing Box
- You give Mairisa bint Fuda Glowing Box.
- Mairisa bint Fuda tells you, "It can't be I thought this had been lost long ago...."
- You've earned 18,000,000 experience.
- Mairisa slowly opens the box, the golden glow washes across her face. Her facial expression seems to become more calm.
- Mairisa bint Fuda tells you, "Thank you kind adventurer, it was a kind gesture of yours to return this to it's rightful owner."
- You must wait 26d 23h 43m 37s to retrieve the box again.
Update History Edit
The Madness of Men updated.
|
Trivia Edit
See also: The Great Work Crystal event page
When this quest was introduced, the Aluvian lord Sir Joffre Tremblant had only just been killed and then resurrected by the Gelidite. Each of the servers had a single chance to defeat him in his new form and loot his unique Ivory Staff.
