Liberation of Uziz: Difference between revisions
>Arkalor's Bot m (Text replace - "{{Quest Summary Temp" to "{{Quest Summary") |
m (→Walkthrough & Notes: tooltip links, replaced: {{Icon Link Small| → {{Itemlink| (2)) |
||
| Line 16: | Line 16: | ||
# Travel to the [[Virindi Edifice]] in the desert at 19.4S 18.2E. | # Travel to the [[Virindi Edifice]] in the desert at 19.4S 18.2E. | ||
#* Route: [[Al-Arqas]] to [[Ahr-Zona]] portal at 33.5S, 13.1E | #* Route: [[Al-Arqas]] to [[Ahr-Zona]] portal at 33.5S, 13.1E | ||
#* {{Optional}} Pick up {{ | #* {{Optional}} Pick up {{Itemlink|Dream Beacon}} text on the floor outside the portal. | ||
# You will enter into a room with 3 hallways branching off to the left, right, and middle | # You will enter into a room with 3 hallways branching off to the left, right, and middle | ||
#* Note: The dungeon is full of levers. Be careful as most of these are fake and drain your health when used. | #* Note: The dungeon is full of levers. Be careful as most of these are fake and drain your health when used. | ||
| Line 33: | Line 33: | ||
# At the bottom you will find the [[Curator of Torment]]. When you enter the room he will summon and kill Uziz's Town Crier. (Stand back or he will kill you too!). He will then summon a [[Simulacrum Shifter]]. If you let him do that, The boss casts life protection over himself (like anek'shays) and summons lightning elementals that will hit hard, war and vuln. For a short fight, a life mage should do the imperil+vulns (debuffing his weapon next) while the others attack him immediately with AR/Soulbound weapons. (use Slash/Bludgeon/Pierce damage) | # At the bottom you will find the [[Curator of Torment]]. When you enter the room he will summon and kill Uziz's Town Crier. (Stand back or he will kill you too!). He will then summon a [[Simulacrum Shifter]]. If you let him do that, The boss casts life protection over himself (like anek'shays) and summons lightning elementals that will hit hard, war and vuln. For a short fight, a life mage should do the imperil+vulns (debuffing his weapon next) while the others attack him immediately with AR/Soulbound weapons. (use Slash/Bludgeon/Pierce damage) | ||
#* '''WARNING!!:''' If you fight the boss outside of the room and kill him, there is a triggering floor plate at the entrance of the room that will re trigger the event if you walk on it : Face the entrance and do a small power forward jump over it. | #* '''WARNING!!:''' If you fight the boss outside of the room and kill him, there is a triggering floor plate at the entrance of the room that will re trigger the event if you walk on it : Face the entrance and do a small power forward jump over it. | ||
# Kill the boss and loot the {{ | # Kill the boss and loot the {{Itemlink|Door Key (Virindi Edifice)}}. Use the key on the locked door ahead, jump over the pit, and continue until you find the [[Vision of Horror (Virindi Edifice)|Vision of Horror]], along with the [[Uziz]] townsfolk. | ||
# Talk to the [[Vision of Horror (Virindi Edifice)|Virindi Delegate]] for your rewards. | # Talk to the [[Vision of Horror (Virindi Edifice)|Virindi Delegate]] for your rewards. | ||
Revision as of 19:29, 21 November 2014
| Walkthrough & Notes Dungeons & Maps Rewards Images Dialog Update History |
| Liberation of Uziz | |
|---|---|
| Level: | 180 |
| Type: | Fellowship |
| Starts With: | Virindi Edifice |
| Starts At: | 19.4S, 18.2E |
| Route: | Al-Arqas to Ahr-Zona portal at 33.5S, 13.1E |
| Repeat: | 20 Hours |
| Contracts: | Contract for Uziz Abductions |
Overview
Walkthrough & Notes
- Travel to the Virindi Edifice in the desert at 19.4S 18.2E.
- Route: Al-Arqas to Ahr-Zona portal at 33.5S, 13.1E
- Optional: Pick up Dream Beacon text on the floor outside the portal.
- You will enter into a room with 3 hallways branching off to the left, right, and middle
- Note: The dungeon is full of levers. Be careful as most of these are fake and drain your health when used.
- Head left at the first split and make your way past the hollow minions and simulacra to a lever on the wall with blood spots below it.
- Route:. After you make the initial turn left, take a right (north) at the first split and then another right (north) into a small room.
- From here proceed west until you come to another T intersection. Head left (east) into the small room and up the ramp
- Up the ramp in the first small room is a lever with puddles of blood under it.
- Hit the bloodied lever, then continue up and jump down. From here, return to the main entrance with the 3 splits
- From the main entrance again, take the right hallway followed by another right, then proceed straight through the now-open lever door and jump over the pit.
- Continue through 3 rooms until you come to the 4 room (a small square room). In here you will find a jumping puzzle above you (if you come to a door opening to a pit, you have gone too far).
- Make your way up the jumping puzzle. The platforms are grates, and may be difficult to see (try using overhead view). At the top of the jumping puzzle is a lever, hit it.
- After hitting the lever, jump down and continue onward to the door opening to a pit. Jump down, and head west back to the main entrance.
- From the main entrance take the middle path. Continue north until you come to an open door and a pit. Jump across, and continue until you find a lever with a blue flame above it. Pull it.
- After pulling the lever, continue on opening doors as you go. When you come to a pit, jump down and head south back to the main entrance
- From the main entrance, head right again, followed by a left. Follow the hall to the now-open door and jump down.
- At the bottom you will find the Curator of Torment. When you enter the room he will summon and kill Uziz's Town Crier. (Stand back or he will kill you too!). He will then summon a Simulacrum Shifter. If you let him do that, The boss casts life protection over himself (like anek'shays) and summons lightning elementals that will hit hard, war and vuln. For a short fight, a life mage should do the imperil+vulns (debuffing his weapon next) while the others attack him immediately with AR/Soulbound weapons. (use Slash/Bludgeon/Pierce damage)
- WARNING!!: If you fight the boss outside of the room and kill him, there is a triggering floor plate at the entrance of the room that will re trigger the event if you walk on it : Face the entrance and do a small power forward jump over it.
- Kill the boss and loot the Door Key (Virindi Edifice). Use the key on the locked door ahead, jump over the pit, and continue until you find the Vision of Horror, along with the Uziz townsfolk.
- Talk to the Virindi Delegate for your rewards.
Dungeons & Maps
| Dungeon | Coordinates | Wiki Map | ACmaps |
|---|---|---|---|
| Virindi Edifice | 19.4S, 18.2E | -- | -- |
Rewards
| Experience: | 275,000,000 (Fixed) |
| Luminance: | 20,000 |
| Titles: | Liberator of Uziz |
| Items: | |
| |
Images
Click image for full size version.
-
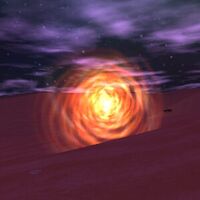
Portal to the Virindi Edifice
-

Simulacrum Shifter
-
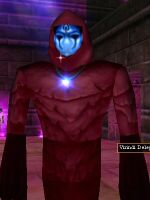
Virindi Delegate


_Live.jpg)
Dialog
Update History
|