Falatacot Medallion: Difference between revisions
m (1 revision: Source http://ac.wikkii.net) |
>Arkalor's Bot m (Text replace - "{{Quest Summary Temp" to "{{Quest Summary") |
||
| Line 1: | Line 1: | ||
{{Quest Summary | {{Quest Summary | ||
| | | Level = 1-40 | ||
| | | Level 2 = 41-80 | ||
| | | Level 3 = 81-120 | ||
| | | Level 4 = 121 | Recommended Level = | ||
| Quest Type = Small Fellowship | |||
| Starts With = [[Gruuk'lar]] | |||
| Quest Type = | | Starts At = [[Kor-Gursha]] | ||
| | | Route = | ||
| | | Repeat Timer = 20 Hours | ||
| | | Time to Complete = | ||
| | |||
| | |||
| Contracts = | | Contracts = | ||
}} | }} | ||
== | == Overview == | ||
== | == Walkthrough & Notes == | ||
# Make you way to one of the [[#Dungeons & Maps|dungeons]] below that is relevant to your and your fellowship's level. | |||
#* [[Muggy Guruk Caverns]] is found in the main NPC room of [[Kor-Gursha]]. It's the right hand path on the east wall. | |||
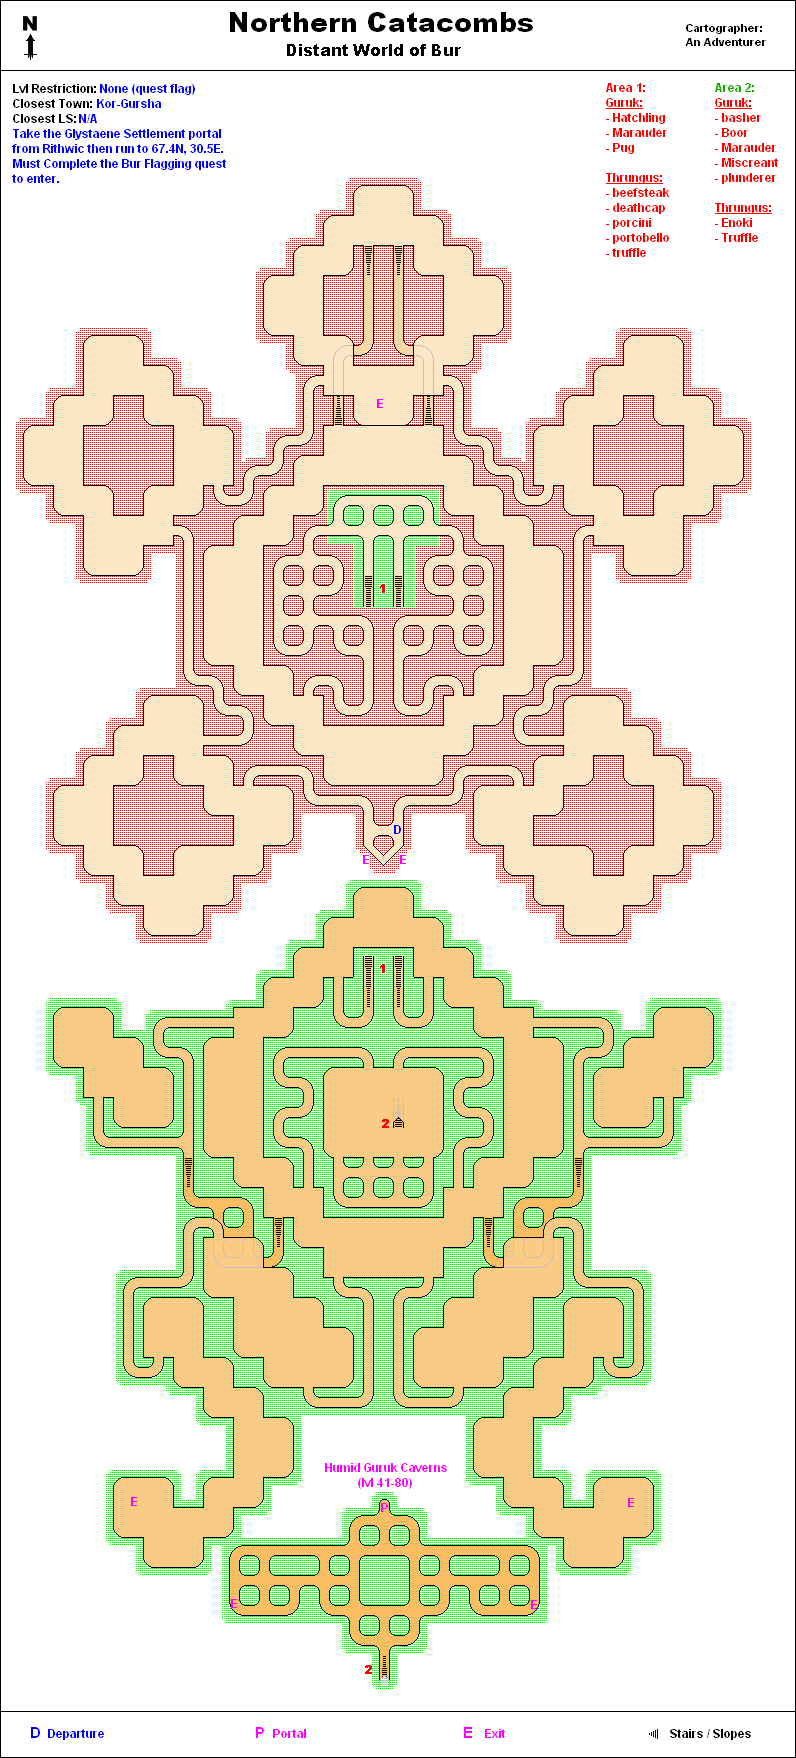
#* [[Humid Guruk Caverns]] is found in the [[Northern Catacombs]] - see [[Media:00D2.jpg|map]] for directions. | |||
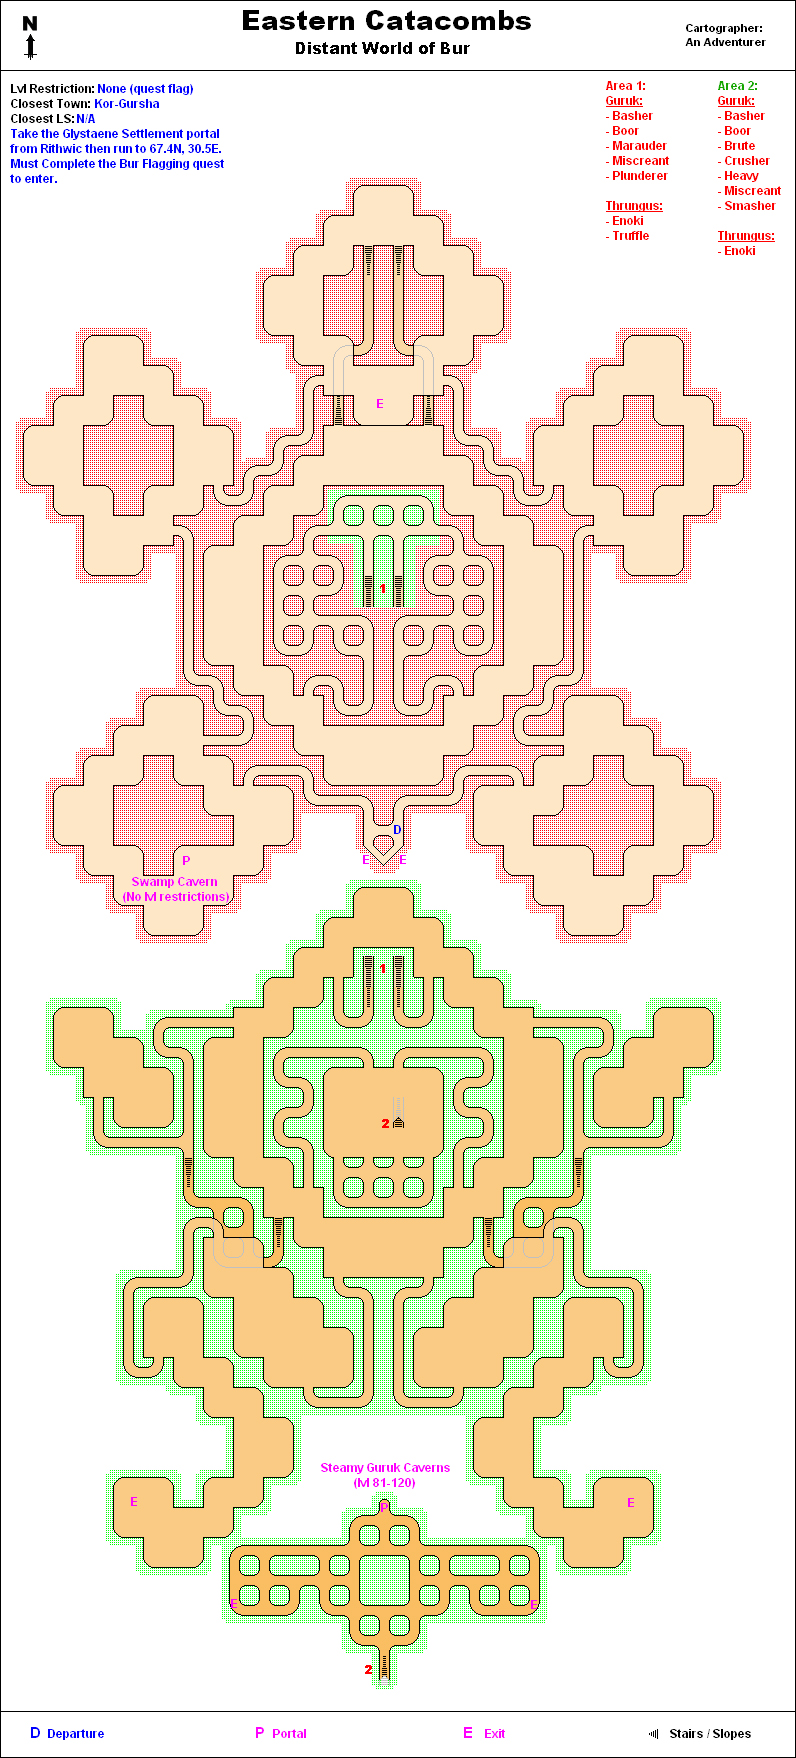
#* [[Steamy Guruk Caverns]] is found in the [[Eastern Catacombs]] - see [[Media:00D3.jpg|map]] for directions. | |||
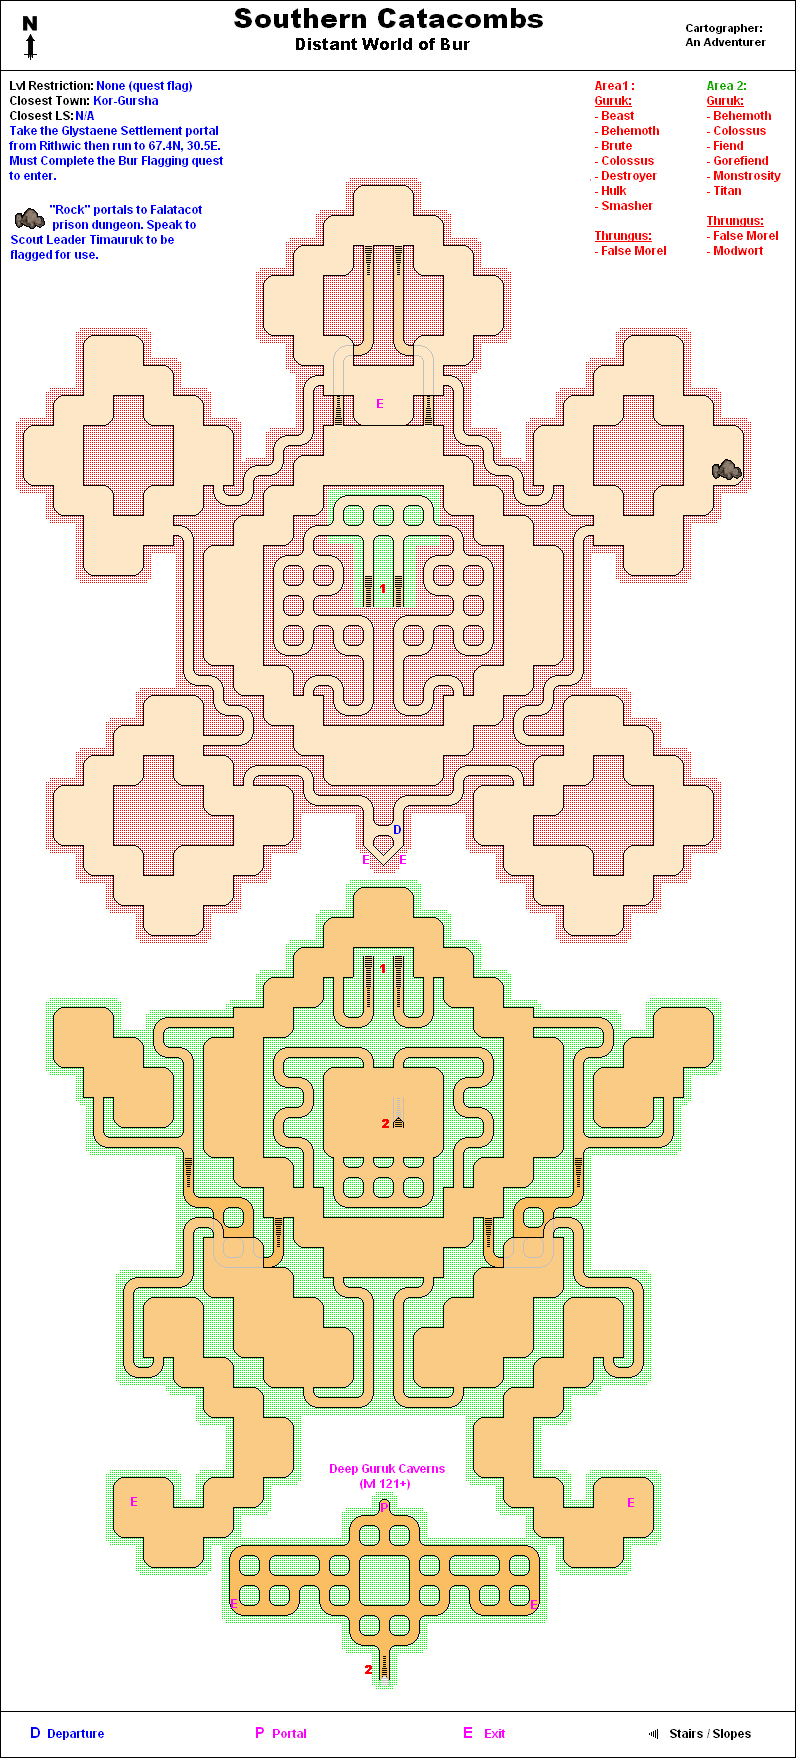
#* [[Deep Guruk Caverns]] is found in the [[Southern Catacombs]] - see [[Media:00D4.jpg|map]] for directions. | |||
# One you portal in, go east while hugging the right wall. | |||
# You will come to a corridor with two paths leading down southwards. Take the left path, following it to the end. | |||
# You will come out into a large room. | |||
# Head north to the very end of the chamber and take the right hand exit leading east and then take a right hand turn at the intersection. | |||
# You will again exit into a large room, take the northeast exit and follow the corridor until you reach an intersection. Go left from here heading east. | |||
# You will now go down a longer than usual path leading into the final room. | |||
# The Falatacot boss can be found just around the corner to the north of the large room. The boss varies on what dungeon you entered and will be flanked by other creatures. | |||
#* [[Muggy Guruk Caverns]] (Level 1-40) - Defeat [[Abbess Kivit]] and loot the {{Icon Link Small|Decorated Falatacot Medallion}}. | |||
#* [[Humid Guruk Caverns]] (Level 41-80) - Defeat [[Abbess Tir'Livik]] and loot the {{Icon Link Small|Enameled Falatacot Medallion}} | |||
#* [[Steamy Guruk Caverns]] (Level 81-120) - Defeat [[Matriarch Vik'Liri Di]] and loot the {{Icon Link Small|Engraved Falatacot Medallion}}. | |||
#* [[Deep Guruk Caverns]] (Level 121+) - Defeat [[Matriarch Mirta'kir]] and loot the {{Icon Link Small|Ornate Falatacot Medallion}}. | |||
== | == Dungeons & Maps == | ||
{{Dungeon Table | {{Dungeon Table | ||
| Table Rows = | | Table Rows = | ||
{{Dungeon Maps | {{Dungeon Maps | ||
| Dungeon = Muggy Guruk Caverns | | Dungeon = Muggy Guruk Caverns{{!}}Muggy Guruk Caverns (Level 1-40) | ||
| Coordinates = | | Coordinates = N/A | ||
| Wiki Map File = | | Wiki Map File = Muggy Guruk Caverns.jpg | ||
}} | }} | ||
{{Dungeon Maps | {{Dungeon Maps | ||
| Dungeon = Humid Guruk Caverns | | Dungeon = Humid Guruk Caverns{{!}}Humid Guruk Caverns (Level 41-80) | ||
| Coordinates = | | Coordinates = N/A | ||
| Wiki Map File = | | Wiki Map File = Humid Guruk Caverns.jpg | ||
}} | }} | ||
{{Dungeon Maps | {{Dungeon Maps | ||
| Dungeon = Steamy Guruk Caverns | | Dungeon = Steamy Guruk Caverns{{!}}Steamy Guruk Caverns (Level 81-120) | ||
| Coordinates = | | Coordinates = N/A | ||
| Wiki Map File = | | Wiki Map File = Steamy Guruk Caverns.jpg | ||
}} | }} | ||
{{Dungeon Maps | {{Dungeon Maps | ||
| Dungeon = Deep Guruk Caverns | | Dungeon = Deep Guruk Caverns{{!}}Deep Guruk Caverns (Level 121+) | ||
| Coordinates = | | Coordinates = N/A | ||
| Wiki Map File = | | Wiki Map File = | ||
}} | }} | ||
}} | }} | ||
== | == Rewards == | ||
=== Experience === | |||
== Experience | |||
{{Quest Experience Table | {{Quest Experience Table | ||
| Repeat Differs = False | | Repeat Differs = False | ||
| Line 162: | Line 81: | ||
}} | }} | ||
{{Quest Task | {{Quest Task | ||
| Description = Turn in [[Ornate Falatacot Medallion]] ( | | Description = Turn in [[Ornate Falatacot Medallion]] (121+) | ||
| Max XP = | | Max XP = 69,000,000 | ||
| Percent of Level = | | Percent of Level = | ||
| Level Cap = | | Level Cap = | ||
| Line 169: | Line 88: | ||
}} | }} | ||
== | === Titles === | ||
{{Title Rewards Table | {{Title Rewards Table | ||
| Table Rows = | | Table Rows = | ||
| Line 180: | Line 99: | ||
== Images == | == Images == | ||
Click image for full size version. | Click image for full size version. | ||
<gallery widths=200px heights=200px perrow= | <gallery widths=200px heights=200px perrow=3> | ||
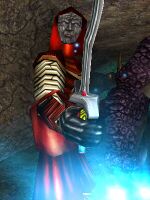
File:Gruuk'lar Live.jpg|Gruuk'lar | |||
File:Abbess Kivit Live.jpg|Abbess Kivit | File:Abbess Kivit Live.jpg|Abbess Kivit | ||
File:Abbess Tir'Livik Live.jpg|Abbess Tir'Livik | File:Abbess Tir'Livik Live.jpg|Abbess Tir'Livik | ||
| Line 187: | Line 107: | ||
</gallery> | </gallery> | ||
== | == Dialog == | ||
=== Opening Dialog === | |||
:Gruuk'lar tells you, "Greetings, traveler from Dereth." | |||
:Gruuk'lar tells you, "Don't look too surprised that I know your language. We've had one of your people here for some time, teaching us of your ways. Teaching us of this metal you call 'Pyreal' and of how to engage in 'Commerce'." | |||
:Gruuk'lar tells you, "But I digress. I'm no gatherer or 'merchant' to trade in such things. I'm a guardian of this small Tribe, and my Clutch helps protect and hide this place from the others." | |||
:Gruuk'lar tells you, "There are four caverns which have become connected to this cavern via magic, "Portals" I have heard them called. They appeared the same time Torgluuk and Asheron disappeared, and occasionally Guruk come through them to attack us. I have sent hunters from my Clutch, but none have returned, and I can't afford to send more, as we must be ready to defend the village." | |||
:Gruuk'lar tells you, "These Guruk who attack us seem to be being controlled by those your people call Falatacot. The False Gods of our hated Fiazhat enemies. Travel into these 'Portals', destroy these False Gods, and bring proof of their demise to me, and I will reward you." | |||
:Gruuk'lar looks you over. | |||
:Gruuk'lar tells you, "There is a portal to the Southern Catacombs, down the tunnel to the Northeast of here. In the depths of those catacombs, you will find the portal to the Deep Guruk Caverns." | |||
=== Handing in Engraved Falatacot Medallion === | |||
:You give Gruuk'lar Engraved Falatacot Medallion. | |||
:Gruuk'lar looks the medallion over, sniffing at it. | |||
:Gruuk'lar tells you, "There is strange magic on this. I will send it to our Shaman, and see what they can learn from it. Thank you. It is a clue, and with it, we may be able to track down more information." | |||
Gruuk'lar looks the medallion over, sniffing at it. | :Gruuk'lar tells you, "Take this." | ||
:You've earned 48,300,000 experience. | |||
Gruuk'lar tells you, "Take this." | :Gruuk'lar declares you an ally of the Ruuk. | ||
Gruuk'lar declares you an ally of the Ruuk. | == Update History == | ||
{{Update History| | |||
[[Bridging the Vast Divide]] | |||
* Quest introduced. | |||
[[Learning From Experience]] | |||
* XP reward for Decorated Medallion increased from 350,000 (?%pxp) to ?? | |||
* | * XP reward for Enameled Medallion increased from 4,000,000 (?%pxp) to 25,500,000 | ||
* | * XP reward for Engraved Medallion increased from 20,000,000 (?%pxp) to 48,300,000 | ||
* | * XP reward for Ornate Medallion increased from 60,000,000 (?%pxp) to 69,000,000 | ||
* | |||
[[The Quest for Freedom]] | |||
* Repeat timer changed from 6 days to 20 hours. | |||
}} | |||
Revision as of 05:40, 13 March 2014
| Walkthrough & Notes Dungeons & Maps Rewards Images Dialog Update History |
| Falatacot Medallion | |
|---|---|
| Level: | 1-40 |
| Type: | Small Fellowship |
| Starts With: | Gruuk'lar |
| Starts At: | Kor-Gursha |
| Repeat: | 20 Hours |
Overview
Walkthrough & Notes
- Make you way to one of the dungeons below that is relevant to your and your fellowship's level.
- Muggy Guruk Caverns is found in the main NPC room of Kor-Gursha. It's the right hand path on the east wall.
- Humid Guruk Caverns is found in the Northern Catacombs - see map for directions.
- Steamy Guruk Caverns is found in the Eastern Catacombs - see map for directions.
- Deep Guruk Caverns is found in the Southern Catacombs - see map for directions.
- One you portal in, go east while hugging the right wall.
- You will come to a corridor with two paths leading down southwards. Take the left path, following it to the end.
- You will come out into a large room.
- Head north to the very end of the chamber and take the right hand exit leading east and then take a right hand turn at the intersection.
- You will again exit into a large room, take the northeast exit and follow the corridor until you reach an intersection. Go left from here heading east.
- You will now go down a longer than usual path leading into the final room.
- The Falatacot boss can be found just around the corner to the north of the large room. The boss varies on what dungeon you entered and will be flanked by other creatures.
- Muggy Guruk Caverns (Level 1-40) - Defeat Abbess Kivit and loot the
 Decorated Falatacot Medallion.
 - Humid Guruk Caverns (Level 41-80) - Defeat Abbess Tir'Livik and loot the
 Enameled Falatacot Medallion
 - Steamy Guruk Caverns (Level 81-120) - Defeat Matriarch Vik'Liri Di and loot the
 Engraved Falatacot Medallion.
 - Deep Guruk Caverns (Level 121+) - Defeat Matriarch Mirta'kir and loot the
 Ornate Falatacot Medallion.
- Muggy Guruk Caverns (Level 1-40) - Defeat Abbess Kivit and loot the
Dungeons & Maps
| Dungeon | Coordinates | Wiki Map | ACmaps |
|---|---|---|---|
| Muggy Guruk Caverns (Level 1-40) | N/A | -- | |
| Humid Guruk Caverns (Level 41-80) | N/A | -- | |
| Steamy Guruk Caverns (Level 81-120) | N/A | -- | |
| Deep Guruk Caverns (Level 121+) | N/A | -- | -- |
Rewards
Experience
Titles
Images
Click image for full size version.
-
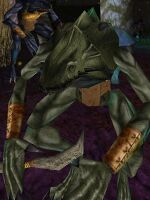
Gruuk'lar
-
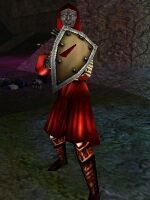
Abbess Kivit
-
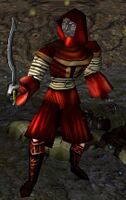
Abbess Tir'Livik
-
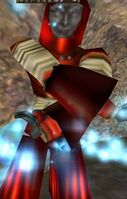
Matriarch Vik'Liri Di
-
Matriarch Mirta'kir


Dialog
Opening Dialog
- Gruuk'lar tells you, "Greetings, traveler from Dereth."
- Gruuk'lar tells you, "Don't look too surprised that I know your language. We've had one of your people here for some time, teaching us of your ways. Teaching us of this metal you call 'Pyreal' and of how to engage in 'Commerce'."
- Gruuk'lar tells you, "But I digress. I'm no gatherer or 'merchant' to trade in such things. I'm a guardian of this small Tribe, and my Clutch helps protect and hide this place from the others."
- Gruuk'lar tells you, "There are four caverns which have become connected to this cavern via magic, "Portals" I have heard them called. They appeared the same time Torgluuk and Asheron disappeared, and occasionally Guruk come through them to attack us. I have sent hunters from my Clutch, but none have returned, and I can't afford to send more, as we must be ready to defend the village."
- Gruuk'lar tells you, "These Guruk who attack us seem to be being controlled by those your people call Falatacot. The False Gods of our hated Fiazhat enemies. Travel into these 'Portals', destroy these False Gods, and bring proof of their demise to me, and I will reward you."
- Gruuk'lar looks you over.
- Gruuk'lar tells you, "There is a portal to the Southern Catacombs, down the tunnel to the Northeast of here. In the depths of those catacombs, you will find the portal to the Deep Guruk Caverns."
Handing in Engraved Falatacot Medallion
- You give Gruuk'lar Engraved Falatacot Medallion.
- Gruuk'lar looks the medallion over, sniffing at it.
- Gruuk'lar tells you, "There is strange magic on this. I will send it to our Shaman, and see what they can learn from it. Thank you. It is a clue, and with it, we may be able to track down more information."
- Gruuk'lar tells you, "Take this."
- You've earned 48,300,000 experience.
- Gruuk'lar declares you an ally of the Ruuk.
Update History
|