Aerbax's Prodigal Human: Difference between revisions
m (Adding missing 'px' suffix to video pixel width) |
>Arkalor's Bot m (Text replace - "Category:Video" to "Category:Videos") |
||
| Line 1: | Line 1: | ||
{{Aerbax's Prodigal Quest Links}} | {{Aerbax's Prodigal Quest Links}} | ||
{{Quest Summary | {{Quest Summary | ||
| | | Level = 150 | Recommended Level = 170+ | ||
| Quest Type = Solo | |||
| Starts With = | |||
| Starts At = [[Hidden Laboratory]] at 67.2N, 27.1W | |||
| Route = [[Stonehold]] | |||
| Repeat Timer = 20 Hours | |||
| Quest Type = Solo | | Time to Complete = | ||
| | |||
| | |||
| | |||
| | |||
| | |||
| Contracts = [[Contract for Aerbax's Prodigal Human]] | | Contracts = [[Contract for Aerbax's Prodigal Human]] | ||
}} | }} | ||
== | == Overview == | ||
Dojiro Sangi went missing some time ago, along with a drudge near holtburg, Harraag the Banderling, the Aun Town Crier from Timaru, and Claude the Virindi mage of Ayan. Now we have learned the fate of Dojiro. Thankfully he was not fully turned by Aerbax, and with our help, he has ended his new tortured life and rendered Aerbax's Prodigal Isparian experiment useless. | |||
See [[Missing Persons Investigation]] for more information. | |||
* This quest opened up with a [[12/06/07 - Leafcull - Prodigal Human Investigation|live event]] during the [[Children of the Prodigal Lord]] patch. It currently has no starting rumor or NPC to speak to. | * This quest opened up with a [[12/06/07 - Leafcull - Prodigal Human Investigation|live event]] during the [[Children of the Prodigal Lord]] patch. It currently has no starting rumor or NPC to speak to. | ||
* [[Lockpick]] is not required, but can be used instead of the key. However, the key is found in the same room as the door, so picking the lock is not much of a time saver. | * [[Lockpick]] is not required, but can be used instead of the key. However, the key is found in the same room as the door, so picking the lock is not much of a time saver. | ||
== | == Walkthrough & Notes == | ||
# Proceed carefully through dungeon. There are high level [[Simulacrum|Simulacra]], [[Tuskers]], [[Virindi]], and [[Hollow Minion]]s, including the [[Blight Hollow Minion]] (new to this dungeon). | # Proceed carefully through dungeon. There are high level [[Simulacrum|Simulacra]], [[Tuskers]], [[Virindi]], and [[Hollow Minion]]s, including the [[Blight Hollow Minion]] (new to this dungeon). | ||
# When you reach a large room with a door made of glowing energy, you must either kill the [[Lab Guardian]] Virindi to acquire the | # When you reach a large room with a door made of glowing energy, you must either kill the [[Lab Guardian]] Virindi to acquire the {{Icon Link Small|Lab Guardian's Key}}, or pick the door with lockpick (800 resistance can be reduced to 600 with weaken lock 7). The key has 3 uses to open three doors so it can be worth your time to get it. | ||
# Continue through dungeon. There is a doorway leading to a large pit full of energy. There is an invisible floor here. Cross to the other side and open the energy door with the same key from before or pick it again. | # Continue through dungeon. There is a doorway leading to a large pit full of energy. There is an invisible floor here. Cross to the other side and open the energy door with the same key from before or pick it again. | ||
# Continue to the final room. It is best to destroy the minions before taking on the Virindi boss [[Demerax the Sculptor]]. He is not easy to solo unless you have a very high magic resist, due to all the other mobs debuffing every spell in the book. He also regens health very quickly, so debuff him if possible. | # Continue to the final room. It is best to destroy the minions before taking on the Virindi boss [[Demerax the Sculptor]]. He is not easy to solo unless you have a very high magic resist, due to all the other mobs debuffing every spell in the book. He also regens health very quickly, so debuff him if possible. | ||
# Kill Demerax and loot the | # Kill Demerax and loot the {{Icon Link Small|Paradox-infused Potion}} and {{Icon Link Small|Virindi Message Shard (Demerax the Sculptor)|Virindi Message Shard}}. | ||
# Give the potion to Dojiro Sangi, located in the center of the room. | # Give the potion to Dojiro Sangi, located in the center of the room. | ||
# Go to [[Candeth Keep]] and give | # Go to [[Candeth Keep]] and give {{Icon Link Small|Dojiro Sangi's Ring}} to [[Ryukai Hiro]] at 87.8S, 67.3W, next to the grocer's shop. | ||
# | #* {{Optional}} Bring [[Observations and Instructions: Dojiro Sangi|Virindi Messege Shard]] to Diyas al-Yat to receive {{Icon Link Small|Observations and Instructions: Dojiro Sangi}}. | ||
== Maps == | == Dungeons & Maps == | ||
{{Dungeon Table | {{Dungeon Table | ||
| Table Rows = | | Table Rows = | ||
| Line 54: | Line 34: | ||
| Coordinates = 67.2N, 27.1W | | Coordinates = 67.2N, 27.1W | ||
| Wiki Map File = | | Wiki Map File = | ||
}} | }} | ||
}} | }} | ||
== Rewards == | |||
{{Rewards Table | |||
| Quest Task = Hand in [[Dojiro Sangi's Ring]] to [[Ryukai Hiro]] | |||
| Item Reward = | |||
* {{Icon Link|Mana Forge Key}} | |||
| Max XP Reward = 240,000,000 | Percent of Level = | Level Cap = 160 | |||
== | | Repeat Max XP Reward = | Repeat Percent of Level = | Repeat Level Cap = | ||
{{ | | Luminance Reward = | ||
| | | Title Reward = Dojiro Sangi's Savior | ||
| | |||
| | |||
== | |||
| | |||
| Title = Dojiro Sangi's Savior | |||
}} | }} | ||
| Line 99: | Line 51: | ||
Click image for full size version. | Click image for full size version. | ||
<gallery widths=200px heights=200px perrow=3> | <gallery widths=200px heights=200px perrow=3> | ||
File:Demerax the Sculptor Live.jpg|Demerax the Sculptor | File:Demerax the Sculptor Live.jpg|Demerax the Sculptor | ||
File:Dojiro Sangi | File:Dojiro Sangi Live.jpg|Dojiro Sangi | ||
</gallery> | </gallery> | ||
== | == Video == | ||
<youtube>WCWKFYYG1M4</youtube> | |||
< | [[Category:Videos]] | ||
== Dialog == | |||
=== Dojiro Sangi === | |||
Dojiro Sangi tells you, "They're turning me into some kind of monster! I hear... voices... inside my head... telling me to... Enighten? everyone? I don't... understand..." | :Dojiro Sangi tells you, "Help... me..." | ||
Dojiro Sangi tells you, "You need, to stop this... for me... I can't... become... this thing." | :Dojiro Sangi tells you, "They're turning me into some kind of monster! I hear... voices... inside my head... telling me to... Enighten? everyone? I don't... understand..." | ||
:Dojiro Sangi tells you, "You need, to stop this... for me... I can't... become... this thing." | |||
:Dojiro Sangi's eyes come into focus on you, and a look of wild desperation fills his ruined face, beneath the mask. | |||
:Dojiro Sangi tells you, "The potion they use on me! It's supposed to be dangerous, if not given slowly! Give it to me! Give me the Bottle! Help me ruin what they are doing to me!!" | |||
:Dojiro Sangi's voice changes, taking on a calm, almost metallic quality. | |||
:Dojiro Sangi tells you, "You will not harm my Prodigal Child. He is your salvation, your race's chance at Enlightenment. He is one of my beloved vessels, our Future! Leave him be, it is only the pains of rebirth that he feels. He will unify us all!" | |||
Dojiro Sangi casts Self Loathing on you. | :Dojiro Sangi casts Synaptic Misfire on you. | ||
:Dojiro Sangi casts Self Loathing on you. | |||
''' | |||
=== Demerax === | |||
Demerax the Sculptor screams in rage as he dies! | :Demerax the Sculptor's voice echoes through the area, "You cannot escape 'Asheron's Protection', little Sangi. Even death will not stop you from becoming my Master's beloved Child." | ||
A searing pain fills your mind, carrying the following words along with it, "You won't stop the Master's plans! It's too late to stop him now!" | :Demerax the Sculptor's laughter echoes along the walls. | ||
=== Defeating Demerax === | |||
:Demerax the Sculptor is incinerated by your assault! | |||
:Demerax the Sculptor screams in rage as he dies! | |||
:A searing pain fills your mind, carrying the following words along with it, "You won't stop the Master's plans! It's too late to stop him now!" | |||
=== Handing in Paradox-infused Potion to Dojiro Sangi === | |||
:You give Dojiro Sangi Paradox-infused Potion. | |||
:Dojiro Sangi tells you, "Yes!!" | |||
:Dojiro Sangi guzzles down the Paradox-infused Potion. | |||
:Dojiro Sangi screams, his voice echoing with the sound of multiple voices, crying out in unison! | |||
:Dojiro Sangi tells you, "Thank you... Please... Take this... home..." | |||
:Dojiro Sangi gives you Dojiro Sangi's Ring. | |||
:Dojiro Sangi's eyes flash with violet light, and a cold humming fills the room. | |||
:A voice fills your mind, "Pray for death, little meat-bag. Your attempts will not foil me forever..." | |||
:With a final shudder, Dojiro Sangi's form disintegrates. | |||
=== Handing in Dojiro Sangi's Ring to Ryukai Hiro === | |||
:You give Ryukai Hiro Dojiro Sangi's Ring. | |||
:Ryukai Hiro tells you, "You have something for me?" | |||
:Ryukai Hiro tells you, "I recognize this... Where did you get this?" | |||
:You tell Ryukai Hiro about your encounter with Dojiro Sangi in Aerbax's Lab. | |||
:Ryukai Hiro tells you, "I see. It is a great sadness that things needed to turn out this way, but you did the right thing, and saved Sangi from a terrible fate. Please, allow me to reward you." | |||
:Ryukai Hiro grants to you the title, "Dojiro Sangi's Savior". | |||
Ryukai Hiro gives you Mana Forge Key. | :You've earned 164,455,904 experience. | ||
:Ryukai Hiro gives you Mana Forge Key. | |||
' | |||
=== Handing in Dojiro Sangi's Ring to Ryukai Hiro (Quest Repeat) === | |||
:You give Ryukai Hiro Dojiro Sangi's Ring. | |||
Ryukai Hiro tells you, "Thank you for once again freeing Dojiro Sangi. Please, accept this reward." | :Ryukai Hiro tells you, "If you have this, it must mean that Aerbax brought Sangi back and continued his mad plans..." | ||
:Ryukai Hiro tells you, "Thank you for once again freeing Dojiro Sangi. Please, accept this reward." | |||
:You've earned 69,729,299 experience. | |||
:Ryukai Hiro gives you Mana Forge Key. | |||
== Update History == | |||
{{Update History| | |||
[[Children of the Prodigal Lord]] | |||
* Quest introduced. | |||
[[Learning From Experience]] | |||
* XP reward increased from ?? to 240,000,000 | |||
[[Risks and Rewards]] | |||
* [[Mana Forge Key]] added to rewards. | |||
[[The Quest for Freedom]] | |||
* Repeat timer changed from 13 days to 20 hours. | |||
* | }} | ||
Revision as of 14:54, 12 April 2014
|
Banderling - Drudge - Harbinger - Human - Lugian - Monouga - Mosswart - Olthoi - Shadow - Tumerok - Tusker |
| Walkthrough & Notes Dungeons & Maps Rewards Images Dialog Update History |
| Aerbax's Prodigal Human | |
|---|---|
| Level: | 150 |
| Rec. Level: | 170+ |
| Type: | Solo |
| Starts At: | Hidden Laboratory at 67.2N, 27.1W |
| Route: | Stonehold |
| Repeat: | 20 Hours |
| Contracts: | Contract for Aerbax's Prodigal Human |
Overview
Dojiro Sangi went missing some time ago, along with a drudge near holtburg, Harraag the Banderling, the Aun Town Crier from Timaru, and Claude the Virindi mage of Ayan. Now we have learned the fate of Dojiro. Thankfully he was not fully turned by Aerbax, and with our help, he has ended his new tortured life and rendered Aerbax's Prodigal Isparian experiment useless. See Missing Persons Investigation for more information.
- This quest opened up with a live event during the Children of the Prodigal Lord patch. It currently has no starting rumor or NPC to speak to.
- Lockpick is not required, but can be used instead of the key. However, the key is found in the same room as the door, so picking the lock is not much of a time saver.
Walkthrough & Notes
- Proceed carefully through dungeon. There are high level Simulacra, Tuskers, Virindi, and Hollow Minions, including the Blight Hollow Minion (new to this dungeon).
- When you reach a large room with a door made of glowing energy, you must either kill the Lab Guardian Virindi to acquire the
 Lab Guardian's Key, or pick the door with lockpick (800 resistance can be reduced to 600 with weaken lock 7). The key has 3 uses to open three doors so it can be worth your time to get it.
 - Continue through dungeon. There is a doorway leading to a large pit full of energy. There is an invisible floor here. Cross to the other side and open the energy door with the same key from before or pick it again.
- Continue to the final room. It is best to destroy the minions before taking on the Virindi boss Demerax the Sculptor. He is not easy to solo unless you have a very high magic resist, due to all the other mobs debuffing every spell in the book. He also regens health very quickly, so debuff him if possible.
- Kill Demerax and loot the
 Paradox-infused Potion and
  Virindi Message Shard.
 - Give the potion to Dojiro Sangi, located in the center of the room.
- Go to Candeth Keep and give
 Dojiro Sangi's Ring to Ryukai Hiro at 87.8S, 67.3W, next to the grocer's shop.
- Optional: Bring Virindi Messege Shard to Diyas al-Yat to receive
 Observations and Instructions: Dojiro Sangi.
- Optional: Bring Virindi Messege Shard to Diyas al-Yat to receive
Dungeons & Maps
| Dungeon | Coordinates | Wiki Map | ACmaps |
|---|---|---|---|
| Hidden Laboratory | 67.2N, 27.1W | -- | -- |
Rewards
| Hand in Dojiro Sangi's Ring to Ryukai Hiro | |
|---|---|
| Experience: | 240,000,000 (??% up to level ??) |
| Titles: | Dojiro Sangi's Savior |
| Items: | |
Images
Click image for full size version.
-
Demerax the Sculptor
-

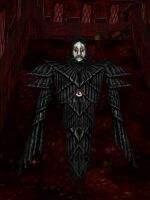
Dojiro Sangi


Video
<youtube>WCWKFYYG1M4</youtube>
Dialog
Dojiro Sangi
- Dojiro Sangi tells you, "Help... me..."
- Dojiro Sangi tells you, "They're turning me into some kind of monster! I hear... voices... inside my head... telling me to... Enighten? everyone? I don't... understand..."
- Dojiro Sangi tells you, "You need, to stop this... for me... I can't... become... this thing."
- Dojiro Sangi's eyes come into focus on you, and a look of wild desperation fills his ruined face, beneath the mask.
- Dojiro Sangi tells you, "The potion they use on me! It's supposed to be dangerous, if not given slowly! Give it to me! Give me the Bottle! Help me ruin what they are doing to me!!"
- Dojiro Sangi's voice changes, taking on a calm, almost metallic quality.
- Dojiro Sangi tells you, "You will not harm my Prodigal Child. He is your salvation, your race's chance at Enlightenment. He is one of my beloved vessels, our Future! Leave him be, it is only the pains of rebirth that he feels. He will unify us all!"
- Dojiro Sangi casts Synaptic Misfire on you.
- Dojiro Sangi casts Self Loathing on you.
Demerax
- Demerax the Sculptor's voice echoes through the area, "You cannot escape 'Asheron's Protection', little Sangi. Even death will not stop you from becoming my Master's beloved Child."
- Demerax the Sculptor's laughter echoes along the walls.
Defeating Demerax
- Demerax the Sculptor is incinerated by your assault!
- Demerax the Sculptor screams in rage as he dies!
- A searing pain fills your mind, carrying the following words along with it, "You won't stop the Master's plans! It's too late to stop him now!"
Handing in Paradox-infused Potion to Dojiro Sangi
- You give Dojiro Sangi Paradox-infused Potion.
- Dojiro Sangi tells you, "Yes!!"
- Dojiro Sangi guzzles down the Paradox-infused Potion.
- Dojiro Sangi screams, his voice echoing with the sound of multiple voices, crying out in unison!
- Dojiro Sangi tells you, "Thank you... Please... Take this... home..."
- Dojiro Sangi gives you Dojiro Sangi's Ring.
- Dojiro Sangi's eyes flash with violet light, and a cold humming fills the room.
- A voice fills your mind, "Pray for death, little meat-bag. Your attempts will not foil me forever..."
- With a final shudder, Dojiro Sangi's form disintegrates.
Handing in Dojiro Sangi's Ring to Ryukai Hiro
- You give Ryukai Hiro Dojiro Sangi's Ring.
- Ryukai Hiro tells you, "You have something for me?"
- Ryukai Hiro tells you, "I recognize this... Where did you get this?"
- You tell Ryukai Hiro about your encounter with Dojiro Sangi in Aerbax's Lab.
- Ryukai Hiro tells you, "I see. It is a great sadness that things needed to turn out this way, but you did the right thing, and saved Sangi from a terrible fate. Please, allow me to reward you."
- Ryukai Hiro grants to you the title, "Dojiro Sangi's Savior".
- You've earned 164,455,904 experience.
- Ryukai Hiro gives you Mana Forge Key.
Handing in Dojiro Sangi's Ring to Ryukai Hiro (Quest Repeat)
- You give Ryukai Hiro Dojiro Sangi's Ring.
- Ryukai Hiro tells you, "If you have this, it must mean that Aerbax brought Sangi back and continued his mad plans..."
- Ryukai Hiro tells you, "Thank you for once again freeing Dojiro Sangi. Please, accept this reward."
- You've earned 69,729,299 experience.
- Ryukai Hiro gives you Mana Forge Key.
Update History
|