Monouga Laboratory: Difference between revisions
m (Adding missing 'px' suffix to video pixel width) |
>Arkalor's Bot m (Text replace - "Category:Video" to "Category:Videos") |
||
| Line 1: | Line 1: | ||
{{Aerbax's Prodigal Quest Links}} | {{Aerbax's Prodigal Quest Links}} | ||
{{Quest Summary | {{Quest Summary | ||
| | | Level = 80 | ||
| | | Level 2 = 120 | ||
| | | Level 3 = 150 | ||
| | | Recommended Level = | ||
| Quest Type = Fellowship | |||
| Starts With = [[Corporal Liao Chen]] (optional) | |||
| Quest Type = | | Starts At = 25.6N 49.3E in [[Cragstone]] | ||
| | | Route = | ||
| | | Repeat Timer = 20 Hours | ||
| | | Time to Complete = | ||
| | |||
| | |||
| Contracts = [[Contract for Aerbax's Prodigal Monouga]] | | Contracts = [[Contract for Aerbax's Prodigal Monouga]] | ||
}} | }} | ||
== | == Overview == | ||
Quest to retrieve experiment logs from the Monouga Laboratory | Quest to retrieve experiment logs from the Monouga Laboratory. | ||
It is easy to run solo to the end of the two higher level versions to pick up the log. The lowest level version, however, has dense spawns which makes it difficult to run without getting stuck. | * There are three versions of this quest, based upon which direction you take at the 4-way intersection near the dungeon entrance. Levels are suggested and not required for portals. This quest is commonly done with the [[Monouga Feeding Pit Quest]] which basically coincides with this one. | ||
* It is easy to run solo to the end of the two higher level versions to pick up the log. The lowest level version, however, has dense spawns which makes it difficult to run without getting stuck. | |||
== | == Walkthrough & Notes == | ||
# | # [[Corporal Liao Chen]] will give you {{Icon Link Small|Monouga Laboratory Portal Attunement Gem}}. | ||
# Run to the [[Monouga Feeding Pits]] at 9.8S 81.0W, southwest of [[Fort Tethana]] (bring your fire/slash weps). | # Run to the [[Monouga Feeding Pits]] at 9.8S 81.0W, southwest of [[Fort Tethana]] (bring your fire/slash weps). | ||
#* A 6.5 click run from [[Gear Knight Invasion Area Camp Recall]]. | #* A 6.5 click run from [[Gear Knight Invasion Area Camp Recall]]. | ||
#* If you don't have the [[Gear Knight Invasion Area Camp Recall]] Give [[Merkitz ibn'Akadh]] in [[Xarabydun]] one Trade Note (250,000). He will summon a portal directly to the [[Direlands Gear Knight Resistance Camp]]. | #* If you don't have the [[Gear Knight Invasion Area Camp Recall]] Give [[Merkitz ibn'Akadh]] in [[Xarabydun]] one Trade Note (250,000). He will summon a portal directly to the [[Direlands Gear Knight Resistance Camp]]. | ||
# Once inside, take the appropriate path for your level of difficulty. Levels are suggested. | # Once inside, take the appropriate path for your level of difficulty. Levels are suggested. | ||
#* South: [[Monouga Laboratory (80+)]] - | #* South: [[Monouga Laboratory (80+)]] - {{Icon Link Small|Tusker Experiment Orb}} | ||
#* East: [[Monouga Laboratory (120+)]] - | #* East: [[Monouga Laboratory (120+)]] - {{Icon Link Small|Olthoi Experiment Log}} | ||
#* North: [[Monouga Laboratory (150+)]] - | #* North: [[Monouga Laboratory (150+)]] - {{Icon Link Small|Monouga Experiment Log}} | ||
# | # {{Optional}} Pickup {{Icon Link Small|Instructions (Monouga Feeding Pit)|Instructions}} from the ground. | ||
# {{Optional}} Ring the bell to summon an Imprisoned Monouga ([[Large Imprisoned Monouga|Large]], [[Huge Imprisoned Monouga|Huge]] or [[Giant Imprisoned Monouga|Giant]]) from the Laboratory to the [[Monouga Feeding Pits|Feeding Pits]]. This portals him into the feeding pits for an hour, and means there will be one less creature to fight in the Laboratory. You can still hand a gem and use the bell after to summon portal after calling the Monouga. | |||
# Hand a [[Monouga Laboratory Portal Attunement Gem]] to the Bell. | # Hand a [[Monouga Laboratory Portal Attunement Gem]] to the Bell. | ||
# Ring the bell '''again''' to summon a portal. | # Ring the bell '''again''' to summon a portal. | ||
# Follow the hallways opposite of the bell until they reach a dead end. | # Follow the hallways opposite of the bell until they reach a dead end. | ||
# | # {{Optional}} If you rang the bell twice, the imprisoned Monouga will be waiting for you. You can then kill it as part of the Monouga Feeding Pit Quest. | ||
# Take the portal at the dead end to travel to the level appropriate Monouga Laboratory. | # Take the portal at the dead end to travel to the level appropriate Monouga Laboratory. | ||
# Stick to the middle tunnel, watch out for lots of shadows and virindi. If alone is likely safer to run. The mid version (120+) seems to have a higher spawn rate (many creatures that spawn almost as fast as you can kill them). All the side passages lead to dead end rooms with lots of spawn. | # Stick to the middle tunnel, watch out for lots of shadows and virindi. If alone is likely safer to run. The mid version (120+) seems to have a higher spawn rate (many creatures that spawn almost as fast as you can kill them). All the side passages lead to dead end rooms with lots of spawn. | ||
# Just before the end is an Imprisoned Monouga (if you didn't summon it to the feeding pits earlier). You are not required to kill it. | # Just before the end is an Imprisoned Monouga (if you didn't summon it to the feeding pits earlier). You are not required to kill it. | ||
# Just past the monouga room, pick up the experiment log on the ground. Note that there is no exit portal available. | # Just past the monouga room, pick up the experiment log on the ground. Note that there is no exit portal available. | ||
# Return to [[Corporal Liao Chen | # Return to [[Corporal Liao Chen]] and hand him the experiment log for your rewards. | ||
== | == Dungeons & Maps == | ||
{{Dungeon Table | {{Dungeon Table | ||
| Table Rows = | | Table Rows = | ||
{{Dungeon Maps | {{Dungeon Maps | ||
| Dungeon = Monouga Feeding Pits | | Dungeon = Monouga Feeding Pits | ||
| Coordinates = 9.8S 81.0W | | Coordinates = 9.8S, 81.0W | ||
| Wiki Map File = 1A73.png | | Wiki Map File = 1A73.png | ||
| ACmaps ID = | | ACmaps ID = | ||
| Line 67: | Line 52: | ||
{{Dungeon Maps | {{Dungeon Maps | ||
| Dungeon = Monouga Laboratory (150+) | | Dungeon = Monouga Laboratory (150+) | ||
| Coordinates = | | Coordinates = N/A | ||
| Wiki Map File = 00A2.png | | Wiki Map File = 00A2.png | ||
}} | }} | ||
{{Dungeon Maps | {{Dungeon Maps | ||
| Dungeon = Monouga Laboratory (120+) | | Dungeon = Monouga Laboratory (120+) | ||
| Coordinates = | | Coordinates = N/A | ||
| Wiki Map File = 00A1.png | | Wiki Map File = 00A1.png | ||
}} | }} | ||
{{Dungeon Maps | {{Dungeon Maps | ||
| Dungeon = Monouga Laboratory (80+) | | Dungeon = Monouga Laboratory (80+) | ||
| Coordinates = | | Coordinates = N/A | ||
| Wiki Map File = 00A0.png | | Wiki Map File = 00A0.png | ||
}} | }} | ||
}} | }} | ||
== | == Rewards == | ||
=== Experience === | |||
== Experience | |||
{{Quest Experience Table | {{Quest Experience Table | ||
| Repeat Differs = True | | Repeat Differs = True | ||
| Line 113: | Line 86: | ||
| Percent of Level = 30 | | Percent of Level = 30 | ||
| Level Cap = 150 | | Level Cap = 150 | ||
| Repeat Max XP = 116,450,000 | | Repeat Max XP = 116,450,000 | ||
| Repeat Percent of Level = | | Repeat Percent of Level = | ||
| Repeat Level Cap = | | Repeat Level Cap = | ||
}} | }} | ||
| Line 127: | Line 100: | ||
}} | }} | ||
}} | }} | ||
== Images == | == Images == | ||
| Line 139: | Line 109: | ||
</gallery> | </gallery> | ||
== | == Video == | ||
<youtube>Y4rAOBvdNr4</youtube>[[Category:Videos]] | |||
- | == Dialog == | ||
=== Opening Dialog === | |||
:Corporal Liao Chen tells you, "Greetings, adventurer. I greet you in the name of Queen Elysa, whose command brings me here today." | |||
:Corporal Liao Chen gives you Monouga Laboratory Portal Attunement Gem. | |||
:Corporal Liao Chen tells you, "We seek intrepid adventurers like yourself, who might be willing to help us investigate a concerning development. It seems that some travelers have discovered a cavern in which drudges have been keeping monougas captive. What is unusual is that the drudges have very sophisticated portal sending enchantments which would seem to be beyond their means. We suspect Virindi involvement of some sort." | |||
:Corporal Liao Chen tells you, "Therefore, Prince Borelean led an expedition to investigate this drudge cavern. When he was finished, he had determined a way to reverse the portal sending - to open a portal from that location to the source of the monougas. These portal gems are the result of that determination." | |||
:Corporal Liao Chen tells you, "The Queen has commanded that whatever lay on the other side of that portal transit should be explored carefully, with the assumption that whatever is there is hostile. To do so, take the gem I have given you and charge it against the feeding bell. It will reverse the workings of the bell's portal sending magic, and, instead of summoning a drudge and a monouga, will open portals to the source of these monsters." | |||
:Corporal Liao Chen tells you, "You are welcome to explore the drudge cave, although many have explored it before now. The Queen seeks adventurers to enter the portal from which the monougas come, and hopefully more fully identify exactly what all of this humanoid activity means to the Isparian inhabitants of Dereth." | |||
=== Handing in Monouga Experiment Log === | |||
:You give Corporal Liao Chen Monouga Experiment Log. | |||
:The guard skims the book, then looks at you with a blank expression. | |||
:Corporal Liao Chen tells you, "This doesn't bode well for the future. Not well at all." | |||
:You've earned 645,854,124 experience. | |||
:Corporal Liao Chen tells you, "I'd better get this to the royals post-haste. They'll want to see this." | |||
=== Handing in Olthoi Experiment Log === | |||
:You give Corporal Liao Chen Experiment Log. | |||
:The guard nods at the journal. | |||
:Corporal Liao Chen tells you, "While I've seen a similar notebook before, I'm sure the researchers will appreciate any new information they might glean from this. Thank you." | |||
:You've earned 48,724,715 experience. | |||
=== Handing in Tusker Experiment Log === | |||
:You give Corporal Liao Chen Tusker Experiment Log. | |||
:The guard nods at the journal. | |||
:Corporal Liao Chen tells you, "While I've seen a similar notebook before, I'm sure the researchers will appreciate any new information they might glean from this. Thank you." | |||
:You've earned 20,673,188 experience. | |||
== Update History == | |||
{{Update History| | |||
[[Intelligent Designs]] | |||
* Quest introduced. | |||
[[Learning From Experience]] | |||
* XP reward for Olthoi Experiment Log increased from 48,724,715 (15% up to level 150) to ??. | |||
* XP reward for Monouga Experiment Log increased from 1,017,135,420 (30% up to level 256) to to 1,017,135,420 (''40%'' up to level 256). | |||
* Repeat XP reward for Monouga Experiment Log increased from 508,567,710 (15% up to level 275) to 1,017,135,420 (40% up to level 256). | |||
[[The Quest for Freedom]] | |||
* Repeat timer changed from 13 days to 20 hours. | |||
}} | |||
* | |||
Revision as of 14:57, 12 April 2014
|
Banderling - Drudge - Harbinger - Human - Lugian - Monouga - Mosswart - Olthoi - Shadow - Tumerok - Tusker |
| Walkthrough & Notes Dungeons & Maps Rewards Images Dialog Update History |
| Monouga Laboratory | |
|---|---|
| Level: | 80 |
| Type: | Fellowship |
| Starts With: | Corporal Liao Chen (optional) |
| Starts At: | 25.6N 49.3E in Cragstone |
| Repeat: | 20 Hours |
| Contracts: | Contract for Aerbax's Prodigal Monouga |
Overview
Quest to retrieve experiment logs from the Monouga Laboratory.
- There are three versions of this quest, based upon which direction you take at the 4-way intersection near the dungeon entrance. Levels are suggested and not required for portals. This quest is commonly done with the Monouga Feeding Pit Quest which basically coincides with this one.
- It is easy to run solo to the end of the two higher level versions to pick up the log. The lowest level version, however, has dense spawns which makes it difficult to run without getting stuck.
Walkthrough & Notes
- Corporal Liao Chen will give you
 Monouga Laboratory Portal Attunement Gem.
 - Run to the Monouga Feeding Pits at 9.8S 81.0W, southwest of Fort Tethana (bring your fire/slash weps).
- A 6.5 click run from Gear Knight Invasion Area Camp Recall.
- If you don't have the Gear Knight Invasion Area Camp Recall Give Merkitz ibn'Akadh in Xarabydun one Trade Note (250,000). He will summon a portal directly to the Direlands Gear Knight Resistance Camp.
- Once inside, take the appropriate path for your level of difficulty. Levels are suggested.
- Optional: Pickup
 Instructions from the ground.
 - Optional: Ring the bell to summon an Imprisoned Monouga (Large, Huge or Giant) from the Laboratory to the Feeding Pits. This portals him into the feeding pits for an hour, and means there will be one less creature to fight in the Laboratory. You can still hand a gem and use the bell after to summon portal after calling the Monouga.
- Hand a Monouga Laboratory Portal Attunement Gem to the Bell.
- Ring the bell again to summon a portal.
- Follow the hallways opposite of the bell until they reach a dead end.
- Optional: If you rang the bell twice, the imprisoned Monouga will be waiting for you. You can then kill it as part of the Monouga Feeding Pit Quest.
- Take the portal at the dead end to travel to the level appropriate Monouga Laboratory.
- Stick to the middle tunnel, watch out for lots of shadows and virindi. If alone is likely safer to run. The mid version (120+) seems to have a higher spawn rate (many creatures that spawn almost as fast as you can kill them). All the side passages lead to dead end rooms with lots of spawn.
- Just before the end is an Imprisoned Monouga (if you didn't summon it to the feeding pits earlier). You are not required to kill it.
- Just past the monouga room, pick up the experiment log on the ground. Note that there is no exit portal available.
- Return to Corporal Liao Chen and hand him the experiment log for your rewards.
Dungeons & Maps
| Dungeon | Coordinates | Wiki Map | ACmaps |
|---|---|---|---|
| Monouga Feeding Pits | 9.8S, 81.0W | -- | |
| Monouga Laboratory (150+) | N/A | -- | |
| Monouga Laboratory (120+) | N/A | -- | |
| Monouga Laboratory (80+) | N/A | -- |
Rewards
Experience
Images
-
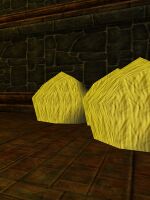
Feeding Pit Room
-
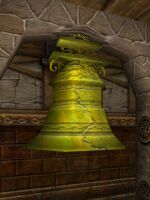
Monouga Feeding Bell
-

Large Imprisoned Monouga
-

Drudge Caretaker


Video
<youtube>Y4rAOBvdNr4</youtube>
Dialog
Opening Dialog
- Corporal Liao Chen tells you, "Greetings, adventurer. I greet you in the name of Queen Elysa, whose command brings me here today."
- Corporal Liao Chen gives you Monouga Laboratory Portal Attunement Gem.
- Corporal Liao Chen tells you, "We seek intrepid adventurers like yourself, who might be willing to help us investigate a concerning development. It seems that some travelers have discovered a cavern in which drudges have been keeping monougas captive. What is unusual is that the drudges have very sophisticated portal sending enchantments which would seem to be beyond their means. We suspect Virindi involvement of some sort."
- Corporal Liao Chen tells you, "Therefore, Prince Borelean led an expedition to investigate this drudge cavern. When he was finished, he had determined a way to reverse the portal sending - to open a portal from that location to the source of the monougas. These portal gems are the result of that determination."
- Corporal Liao Chen tells you, "The Queen has commanded that whatever lay on the other side of that portal transit should be explored carefully, with the assumption that whatever is there is hostile. To do so, take the gem I have given you and charge it against the feeding bell. It will reverse the workings of the bell's portal sending magic, and, instead of summoning a drudge and a monouga, will open portals to the source of these monsters."
- Corporal Liao Chen tells you, "You are welcome to explore the drudge cave, although many have explored it before now. The Queen seeks adventurers to enter the portal from which the monougas come, and hopefully more fully identify exactly what all of this humanoid activity means to the Isparian inhabitants of Dereth."
Handing in Monouga Experiment Log
- You give Corporal Liao Chen Monouga Experiment Log.
- The guard skims the book, then looks at you with a blank expression.
- Corporal Liao Chen tells you, "This doesn't bode well for the future. Not well at all."
- You've earned 645,854,124 experience.
- Corporal Liao Chen tells you, "I'd better get this to the royals post-haste. They'll want to see this."
Handing in Olthoi Experiment Log
- You give Corporal Liao Chen Experiment Log.
- The guard nods at the journal.
- Corporal Liao Chen tells you, "While I've seen a similar notebook before, I'm sure the researchers will appreciate any new information they might glean from this. Thank you."
- You've earned 48,724,715 experience.
Handing in Tusker Experiment Log
- You give Corporal Liao Chen Tusker Experiment Log.
- The guard nods at the journal.
- Corporal Liao Chen tells you, "While I've seen a similar notebook before, I'm sure the researchers will appreciate any new information they might glean from this. Thank you."
- You've earned 20,673,188 experience.
Update History
|