Saving Asheron: Difference between revisions
(Saving Asheron moved to Asheron's Savior) |
No edit summary |
||
| (10 intermediate revisions by 3 users not shown) | |||
| Line 1: | Line 1: | ||
# | {{Custom}} | ||
{{Quest Summary | |||
| Level = 80 | Recommended Level = 150+ | |||
| Quest Type = Fellowship | |||
| Starts With = | |||
| Starts At = [[Kor-Gursha]] on [[Bur]] | |||
| Route = [[Rithwic]] to [[Glystaene Cottages]] portal at 8.9N, 60.9E to [[Portal to Bur]] at 67.4N, 30.5E | |||
| Repeat Timer = 20 Hours | |||
| Time to Complete = | |||
| Contracts = [[Contract for Saving Asheron]] | |||
}} | |||
== Overview == | |||
;Prerequisites | |||
* At least one person must complete the [[Enhancing Mucor]] quest to take the [[Mana Barrier]] down in order to start the quest. The Mana Barrier remains down for 24 hours. | |||
== Walkthrough & Notes == | |||
# Speak to the [[Collector Golem]] to begin the Saving Asheron portion of the quest. To the East and down some ramps eventually to the right. | |||
# Take the East hallway and then speak with [[Scout Leader Tmauruk]]. | |||
# Take the [[Southern Catacombs]] portal. Northern most East Tunnel From here. | |||
# Stick right past Guruk and use ROCK next to [[Temple of the Three, Ritual Chambers]] portal to enter [[Upper Catacombs]]. | |||
# Go up until you come to a hallway filled with side doors. This hallway forms a large square, you start in the middle on the west side. Follow the hallway around to the middle of the east side (don't open any doors). There will be some open doorways going west into a large room from the hallway there. Go up the ramps then up to the west as far as you can go until you come to another large room with a portal to the [[Temple of the Three]]. | |||
# This dungeon has a series of locked doors that can be unlocked using keys dropped by the [[Gate Guardian]]s: | |||
## {{Itemlink|1st Locked Gate Key}} | |||
## {{Itemlink|2nd Locked Gate Key}} | |||
## {{Itemlink|3rd Locked Gate Key}} | |||
## {{Itemlink|4th Locked Gate Key}} | |||
## {{Itemlink|5th Locked Gate Key}} | |||
# You'll come to two [[Mana Barrier]]s that need to be destroyed to access the [[Crystal Array]]. Archers can destroy both barriers from the hallway before the dispel traps. The Mana Barriers have no missile defense, so even untrained missile skills can hit them. If you don't have a trained missile skill, use [[Greater Armor Piercing Arrow]]s and a [[Red Rune Silveran Bow]]. | |||
# Use the crystal and a portal will open to the [[Temple of the Three, Ritual Chambers]]. The portal drop is a good place to rebuff safely. One way down to a large room with a statue at the bottom of three ramps. Kill the statue and a large spawn of sclavus and falatacots will appear. | |||
# After killing [[General Tain'Kivix]] and all of the [[Sclavus Ritualist]]s three named Falatacots will appear. | |||
# Kill the [[High Acolyte of the Sacrifice]] first, then the [[High Acolyte of the Blood]], then the [[High Acolyte of the Spirit]]. | |||
# With all of the falatacots dead, destroy the [[Empyrean Blooded Ritual Statue]] again. | |||
# Pick up a {{Itemlink|Glowing Statue Shard}} and exit using the [[Kor-Gursha]] portal to the north. | |||
# The shards remain on the ground for quite a while, anyone that died or disconnected (the dungeon sends to Lifestone when relogging) can run back (last portal recall to go to the Glystaene Cottages, run to 67.4N 30.5E to go back to [[Bur]], [[Kor-Gursha]], then [[Southern Catacombs]]. When you come to the Rock, instead use the portal next to it, it will send you right back to the [[Temple of the Three, Ritual Chambers]]. Run down and pick up a shard. | |||
# Once you are back in [[Kor-Gursha]], give the shard to the [[Collector Golem]] for your rewards. | |||
Notes | |||
* You are now flagged to do the [[Bur Recall Quest]] which starts in [[Cragstone]]. | |||
== Dungeons & Maps == | |||
{{Dungeon Table | |||
| Table Rows = | |||
{{Dungeon Maps | |||
| Dungeon = Southern Catacombs | |||
| Coordinates = N/A | |||
| Wiki Map File = 00D4.jpg | |||
}} | |||
{{Dungeon Maps | |||
| Dungeon = Upper Catacombs | |||
| Coordinates = N/A | |||
| Wiki Map File = | |||
}} | |||
{{Dungeon Maps | |||
| Dungeon = Temple of the Three | |||
| Coordinates = N/A | |||
| Wiki Map File = | |||
}} | |||
{{Dungeon Maps | |||
| Dungeon = Temple of the Three, Ritual Chambers | |||
| Coordinates = N/A | |||
| Wiki Map File = | |||
}} | |||
}} | |||
== Rewards == | |||
{{Rewards Table | |||
| Quest Task = Give [[Glowing Statue Shard]] to [[Collector Golem]] | |||
| Item Reward = | |||
* {{Icon Link|Empowered Empyrean Robe}} | |||
* {{Icon Link|Essence of the Sundered}} | |||
* {{Icon Link|Fortified Mana Forge Key}} | |||
* {{Icon Link|Trade Note (250,000)}} (x10) | |||
| Max XP Reward = 297,235,856 | Percent of Level = 30 | Level Cap = 200 | |||
| Repeat Max XP Reward = | Repeat Percent of Level = | Repeat Level Cap = | |||
| Luminance Reward = 25,000 | |||
| Title Reward = Asheron's Defender | |||
}} | |||
== Images == | |||
<gallery widths=200px heights=200px perrow=3> | |||
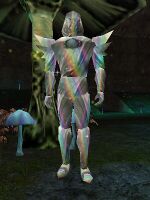
File:Collector Golem Live.jpg|Collector Golem | |||
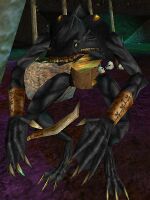
File:Scout Leader Tmauruk Live.jpg|Scout Leader Tmauruk | |||
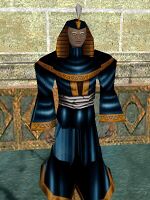
File:Empowered Empyrean Robe Live.jpg|Asheron's Empyrean Robe | |||
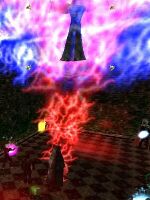
File:Asheron (Saving Asheron) Live.jpg|Asheron when he needed saving | |||
</gallery> | |||
== Dialog == | |||
{{Dialog| | |||
;Collector Golem dialog | |||
|Collector Golem tells you, "Greetings to you, Adventurer from Dereth. I remain here to reward those who aid my Master, Lord Asheron, by defeating the Falatacot's attempts to complete rituals using blood and essence, stolen from my Master." | |||
|Collector Golem tells you, "If you could bring to me any sign of your involvement in Lord Asheron's release, salvation, or defense, I am prepared to reward you for your aid." | |||
;Tmauruk dialog | |||
|Scout Leader Tmauruk tells you, "Jurukka. I am Tmauruk, leader of the scouts of this tribe. While I would rather be away from the town scouting, Gruuklar has asked me to remain here and brief those of you who wish to help." | |||
|Scout Leader Tmauruk tells you, "Torgluuk has been rescued, but the bloodletters continue to abduct the other shamans of the tribe. Torgluuk wants me to continue instructing you Derethians how to find the upper catacomb so that they can be rescued." | |||
|Scout Leader Tmauruk tells you, "There is a rock in the southern catacombs, somewhat near the north of the top level cavern. If you push the rock aside, you'll find a very small corridor, impossible to see without knowing exactly what you are looking for." | |||
|Scout Leader Tmauruk tells you, "Bring the chains that bound the shaman to me as evidence of their freedom." | |||
;Reward dialog | |||
|You give Collector Golem Glowing Statue Shard. | |||
|Collector Golem tells you, "Analyzing..." | |||
|Collector Golem tells you, "Shard identified. Magical lattice points to Falatacot Blood Ritual, with my Lord Asheron's Blood used in the creation of the object this shard is from. Tell me, where did you get this?" | |||
|You tell the Collector Golem about what you have experienced in your part in stopping the Ritual of the Three. | |||
|Collector Golem tells you, "Information noted. I will relay it to my Master. Our thanks to you. You have helped defend Lord Asheron this day, and that should not be forgotten. Please, accept this as a reward for your selfless act." | |||
|You've earned 297,235,856 experience. | |||
|Collector Golem grants you the title, "Asheron's Defender" | |||
|Collector Golem gives you Empowered Empyrean Robe. | |||
|Collector Golem gives you Fortified Mana Forge Key. | |||
;Retired | |||
;Asheron idle dialog | |||
|{{emote|Asheron says, "Must... Stop... Ritual..."}} | |||
|Asheron moans in agony. | |||
;Statue destruction dialog | |||
|As the statue is destroyed, you hear the weak echo of Asheron's voice, "Go... through... portal. Find the ritual statue they have infused with my blood... Destroy it. Before it's... too late for me..." | |||
|As <Player Name> goes to strike the final blow against the statue, it disappears! | |||
|Three voices echo in unison, "They are trying to disrupt the Ritual! Stop them!" | |||
;Boss death dialog | |||
|On far off Bur, a telling blow has been dealt against the ritual of the Three! <Player Name> has killed the Falatacot Matriarch of the Blood! | |||
|On far off Bur, a telling blow has been dealt against the ritual of the Three! <Player Name> has killed the Falatacot Matriarch of Sacrifice! | |||
|On far off Bur, a telling blow has been dealt against the ritual of the Three! <Player Name> has killed the Falatacot Matriarch of the Spirit! | |||
|On faraway Bur, Country Evil has shattered the statue bound to Asheron's Essence into thousands of pieces! The Falatacot Ritual collapses, and a portion of Asheron's Essence is restored. | |||
;Rewards dialog | |||
|You give Collector Golem Glowing Statue Shard. | |||
|Collector Golem tells you, "Analyzing..." | |||
|Collector Golem tells you, "Shard identified. Magical lattice points to Falatacot Blood Ritual, with my Lord Asheron's Blood used in the creation of the object this shard is from. Tell me, where did you get this?" | |||
|You tell the Collector Golem about what you have experienced in the finding of Asheron, including your part in stopping the Ritual of the Three. | |||
|Collector Golem tells you, "Information noted. I will relay it to my Master once he is wholly freed. Our thanks to you. You have helped save Lord Asheron this day, and that should not be forgotten. Please, accept this as a reward for your selfless act." | |||
|You've earned 253,584,507 experience. | |||
|Collector Golem grants you the title, "Asheron's Savior" | |||
|Collector Golem gives you Empowered Empyrean Robe. | |||
}} | |||
== Update History == | |||
{{Update History| | |||
[[Rekindling the Light]] | |||
* Quest introduced. | |||
[[Risks and Rewards]] | |||
* [[Fortified Mana Forge Key]] added to the rewards. | |||
[[The Quest for Freedom]] | |||
* Quest timer changed from 27 days to 20 hours. | |||
}} | |||
== Trivia == | |||
* When the quest was first introduced, Asheron actually needed to be saved from the ritual on Bur. Those who successfully completed the quest the first time received XP, a white {{Itemlink|Empowered Empyrean Robe (White)|Empowered Empyrean Robe}} and the title ''Asheron's Savior''. | |||
Latest revision as of 03:55, 27 May 2024
| Custom Content This page is for custom content on Sundering. |
| Walkthrough & Notes Dungeons & Maps Rewards Images Dialog Update History |
| Saving Asheron | |
|---|---|
| Level: | 80 |
| Rec. Level: | 150+ |
| Type: | Fellowship |
| Starts At: | Kor-Gursha on Bur |
| Route: | Rithwic to Glystaene Cottages portal at 8.9N, 60.9E to Portal to Bur at 67.4N, 30.5E |
| Repeat: | 20 Hours |
| Contracts: | Contract for Saving Asheron |
Overview Edit
- Prerequisites
- At least one person must complete the Enhancing Mucor quest to take the Mana Barrier down in order to start the quest. The Mana Barrier remains down for 24 hours.
Walkthrough & Notes Edit
- Speak to the Collector Golem to begin the Saving Asheron portion of the quest. To the East and down some ramps eventually to the right.
- Take the East hallway and then speak with Scout Leader Tmauruk.
- Take the Southern Catacombs portal. Northern most East Tunnel From here.
- Stick right past Guruk and use ROCK next to Temple of the Three, Ritual Chambers portal to enter Upper Catacombs.
- Go up until you come to a hallway filled with side doors. This hallway forms a large square, you start in the middle on the west side. Follow the hallway around to the middle of the east side (don't open any doors). There will be some open doorways going west into a large room from the hallway there. Go up the ramps then up to the west as far as you can go until you come to another large room with a portal to the Temple of the Three.
- This dungeon has a series of locked doors that can be unlocked using keys dropped by the Gate Guardians:
- You'll come to two Mana Barriers that need to be destroyed to access the Crystal Array. Archers can destroy both barriers from the hallway before the dispel traps. The Mana Barriers have no missile defense, so even untrained missile skills can hit them. If you don't have a trained missile skill, use Greater Armor Piercing Arrows and a Red Rune Silveran Bow.
- Use the crystal and a portal will open to the Temple of the Three, Ritual Chambers. The portal drop is a good place to rebuff safely. One way down to a large room with a statue at the bottom of three ramps. Kill the statue and a large spawn of sclavus and falatacots will appear.
- After killing General Tain'Kivix and all of the Sclavus Ritualists three named Falatacots will appear.
- Kill the High Acolyte of the Sacrifice first, then the High Acolyte of the Blood, then the High Acolyte of the Spirit.
- With all of the falatacots dead, destroy the Empyrean Blooded Ritual Statue again.
- Pick up a Glowing Statue Shard and exit using the Kor-Gursha portal to the north.
- The shards remain on the ground for quite a while, anyone that died or disconnected (the dungeon sends to Lifestone when relogging) can run back (last portal recall to go to the Glystaene Cottages, run to 67.4N 30.5E to go back to Bur, Kor-Gursha, then Southern Catacombs. When you come to the Rock, instead use the portal next to it, it will send you right back to the Temple of the Three, Ritual Chambers. Run down and pick up a shard.
- Once you are back in Kor-Gursha, give the shard to the Collector Golem for your rewards.
Notes
- You are now flagged to do the Bur Recall Quest which starts in Cragstone.
Dungeons & Maps Edit
| Dungeon | Coordinates | Wiki Map | ACmaps |
|---|---|---|---|
| Southern Catacombs | N/A | -- | |
| Upper Catacombs | N/A | -- | -- |
| Temple of the Three | N/A | -- | -- |
| Temple of the Three, Ritual Chambers | N/A | -- | -- |
Rewards Edit
| Give Glowing Statue Shard to Collector Golem | |
|---|---|
| Experience: | 297,235,856 (30% up to level 200) |
| Luminance: | 25,000 |
| Titles: | Asheron's Defender |
| Items: | |
Images Edit
-
Collector Golem
-
Scout Leader Tmauruk
-
Asheron's Empyrean Robe
-
Asheron when he needed saving
Dialog Edit
- Collector Golem dialog
- Collector Golem tells you, "Greetings to you, Adventurer from Dereth. I remain here to reward those who aid my Master, Lord Asheron, by defeating the Falatacot's attempts to complete rituals using blood and essence, stolen from my Master."
- Collector Golem tells you, "If you could bring to me any sign of your involvement in Lord Asheron's release, salvation, or defense, I am prepared to reward you for your aid."
- Tmauruk dialog
- Scout Leader Tmauruk tells you, "Jurukka. I am Tmauruk, leader of the scouts of this tribe. While I would rather be away from the town scouting, Gruuklar has asked me to remain here and brief those of you who wish to help."
- Scout Leader Tmauruk tells you, "Torgluuk has been rescued, but the bloodletters continue to abduct the other shamans of the tribe. Torgluuk wants me to continue instructing you Derethians how to find the upper catacomb so that they can be rescued."
- Scout Leader Tmauruk tells you, "There is a rock in the southern catacombs, somewhat near the north of the top level cavern. If you push the rock aside, you'll find a very small corridor, impossible to see without knowing exactly what you are looking for."
- Scout Leader Tmauruk tells you, "Bring the chains that bound the shaman to me as evidence of their freedom."
- Reward dialog
- You give Collector Golem Glowing Statue Shard.
- Collector Golem tells you, "Analyzing..."
- Collector Golem tells you, "Shard identified. Magical lattice points to Falatacot Blood Ritual, with my Lord Asheron's Blood used in the creation of the object this shard is from. Tell me, where did you get this?"
- You tell the Collector Golem about what you have experienced in your part in stopping the Ritual of the Three.
- Collector Golem tells you, "Information noted. I will relay it to my Master. Our thanks to you. You have helped defend Lord Asheron this day, and that should not be forgotten. Please, accept this as a reward for your selfless act."
- You've earned 297,235,856 experience.
- Collector Golem grants you the title, "Asheron's Defender"
- Collector Golem gives you Empowered Empyrean Robe.
- Collector Golem gives you Fortified Mana Forge Key.
- Retired
- Asheron idle dialog
- Asheron says, "Must... Stop... Ritual..."
- Asheron moans in agony.
- Statue destruction dialog
- As the statue is destroyed, you hear the weak echo of Asheron's voice, "Go... through... portal. Find the ritual statue they have infused with my blood... Destroy it. Before it's... too late for me..."
- As <Player Name> goes to strike the final blow against the statue, it disappears!
- Three voices echo in unison, "They are trying to disrupt the Ritual! Stop them!"
- Boss death dialog
- On far off Bur, a telling blow has been dealt against the ritual of the Three! <Player Name> has killed the Falatacot Matriarch of the Blood!
- On far off Bur, a telling blow has been dealt against the ritual of the Three! <Player Name> has killed the Falatacot Matriarch of Sacrifice!
- On far off Bur, a telling blow has been dealt against the ritual of the Three! <Player Name> has killed the Falatacot Matriarch of the Spirit!
- On faraway Bur, Country Evil has shattered the statue bound to Asheron's Essence into thousands of pieces! The Falatacot Ritual collapses, and a portion of Asheron's Essence is restored.
- Rewards dialog
- You give Collector Golem Glowing Statue Shard.
- Collector Golem tells you, "Analyzing..."
- Collector Golem tells you, "Shard identified. Magical lattice points to Falatacot Blood Ritual, with my Lord Asheron's Blood used in the creation of the object this shard is from. Tell me, where did you get this?"
- You tell the Collector Golem about what you have experienced in the finding of Asheron, including your part in stopping the Ritual of the Three.
- Collector Golem tells you, "Information noted. I will relay it to my Master once he is wholly freed. Our thanks to you. You have helped save Lord Asheron this day, and that should not be forgotten. Please, accept this as a reward for your selfless act."
- You've earned 253,584,507 experience.
- Collector Golem grants you the title, "Asheron's Savior"
- Collector Golem gives you Empowered Empyrean Robe.
Update History Edit
|
Trivia Edit
- When the quest was first introduced, Asheron actually needed to be saved from the ritual on Bur. Those who successfully completed the quest the first time received XP, a white Empowered Empyrean Robe and the title Asheron's Savior.


