Overview
Walkthrough & Notes
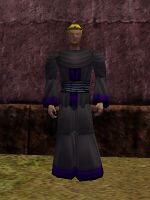
- Talk to Colton Reeyan at Danby's Outpost to receive
 Sealed Letter and
  3 Drugged Meats.
- Run to Colton Reeyan's Sanctuary at 22.9N 37.0W (Approx 8 clicks West of Danby's Outpost).
- Hand the Sealed Letter to the Mosswart Messenger at the entrance. If he isn't there, it means someone else just handed. Wait for him to respawn.
- Note: if you die, you need to get another Sealed Letter to get back in. The killtask does not reset by handing a new letter.
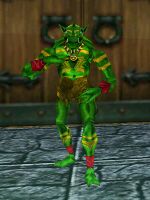
- As you make your way through the dungeon 'killing' the Mosswart Workers and Mosswart Grunts. When they die, they respawn in NPC form. Talk to them when they do. You will need to talk to 10 of them (does not matter if Mosswart Worker or Mosswart Grunt).
- The dungeon has 3 sections. Straight ahead, left and right. Make your way through each section and find the loose pets. Two of the sections require you to jump up a series of platforms.
- Down the left passage (West) you will encounter more mosswarts, and eventually end in a room with platforms going up the wall (you may need to change the camera to see them)
- The following is one of many routes to take to the top: From the lowest platform in the South East Corner, make a half power regular jump to the platform to the west - From there, full power to the middle platform on the east wall - from there full power across to the west - from there, make a full power sidestep jump up to the south west - stand in the middle of the platform and make a second full power sidestep jump to the south. If all went well (and your jump skill is sufficiently high) you should have 1 final jump over to the elevated hallway (which a jump just below 1/2 power should cover).
- At the top, continue into a room with a Mosswart Director and 2 Mosswart Grunts and kill them all. Killing the Director will open a door on the opposite side of the room (for getting back to the entrance)
- Note: Should someone die in the room with the Mosswart Director, the door will re-open after a few minutes
- Hand the Drugged Meat to Shady the Armoredillo to poison him.
- Pick up the Sleeping Armoredillo by using the drugged Shady and place him in Shady's Cage in the other corner of the room.
- Proceed to the end of the passage over the 2 lava jumps and onto the next section.
- Down the middle (north) passage you will come to a room with 2 Mosswart Workers you need to kill and Bubba the pet snow tusker.
- Hand the Drugged Meat to Bubba the Snow Tusker to poison him.
- Pick up the Sleeping Tusker and place him in Bubba's Cage in the other corner of the room.
- Proceed to the end of the passage over the 2 lava jumps and onto the next (E) section. You will find yourself in another room with platforms
- The following is one of many routes to take to the top: Shift-jump upon the first platform on the opposite side of the entrance. From the middle of this platform, another shift-jump towards a platform on the same wall. One step from the ledge of this platform, full power jump to the platform in the corner. From this platform, halfpower-jump to the platform in the middle of still the same wall. Full power jump to the opposite side. Stand on the corner of this platform, and fullpower jump to either of the corners on the opposite sides of the room. Two shift-jumps to get to the exit on top.
- At the top, continue into a room with a Mosswart Director and 2 Mosswart Workers and kill them all.
- Hand the Drugged Meat to Spot the Ursuin to poison him.
- Pick up the Sleeping Ursuin and place him in Spot's Cage in the other corner of the room.
- Proceed to the end of the passage over a lava jump and back to the start.
- Return to Colton Reeyan to collect your rewards.
Dungeons & Maps
Rewards
| Experience:
|
350,000,000 (??% up to level ??)
|
| Luminance:
|
20,000
|
| Titles:
|
Pet Savior
|
| Items:
|
|
|
|
Images
Click image for full size version.
Dialog
Template:Quest Dialog
Update History